How to create a Fun and Cheap Rustic Bathroom Sign
Some of you may know that husband, B and I have been upgrading the house over. We’ve finished main floor which basically means we added new flooring, new kitchen and a new bathroom, with a fresh coat of paint to update the entire house. With all of the updated features I really feel like I can add some great DIY elements! I’m really excited to start adding some new updated decor, my preferences are the rustic, farmhouse look. So today, I’m going to share How to create a Fun and Inexpensive Rustic Bathroom Sign just incase your bathroom needs an update too!
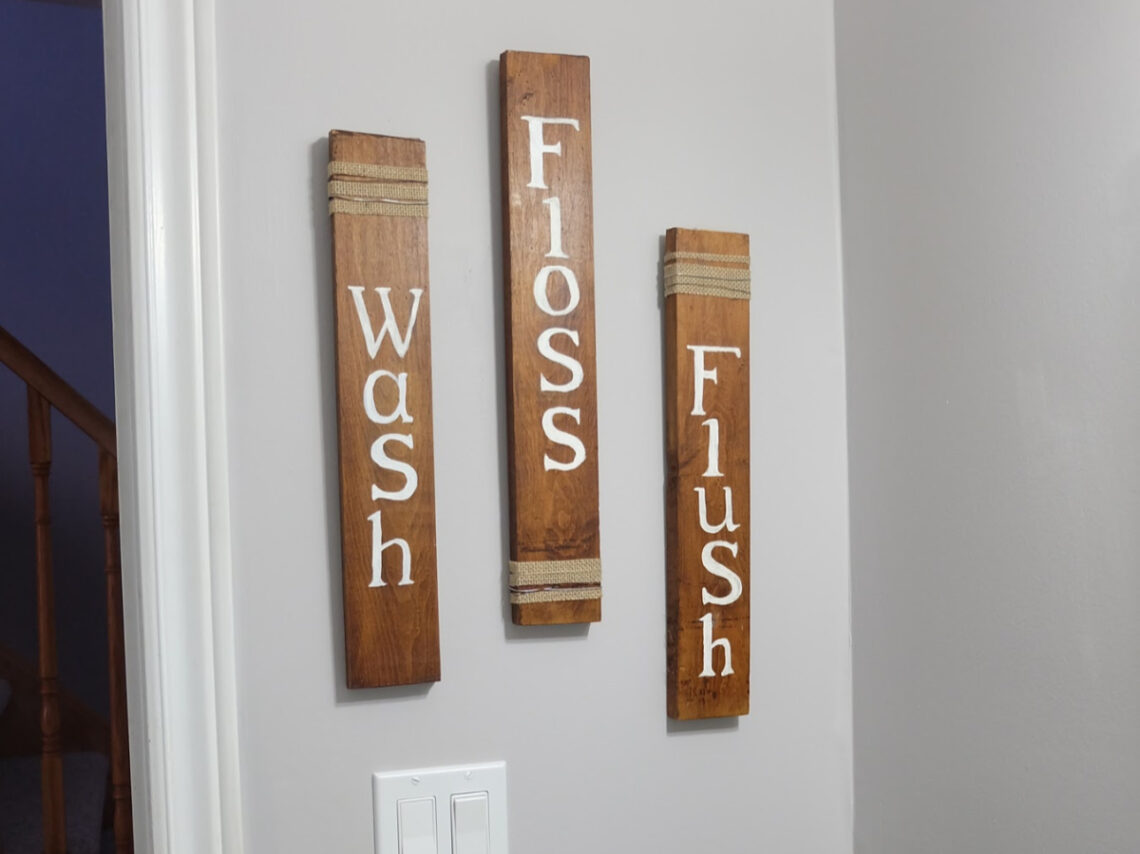
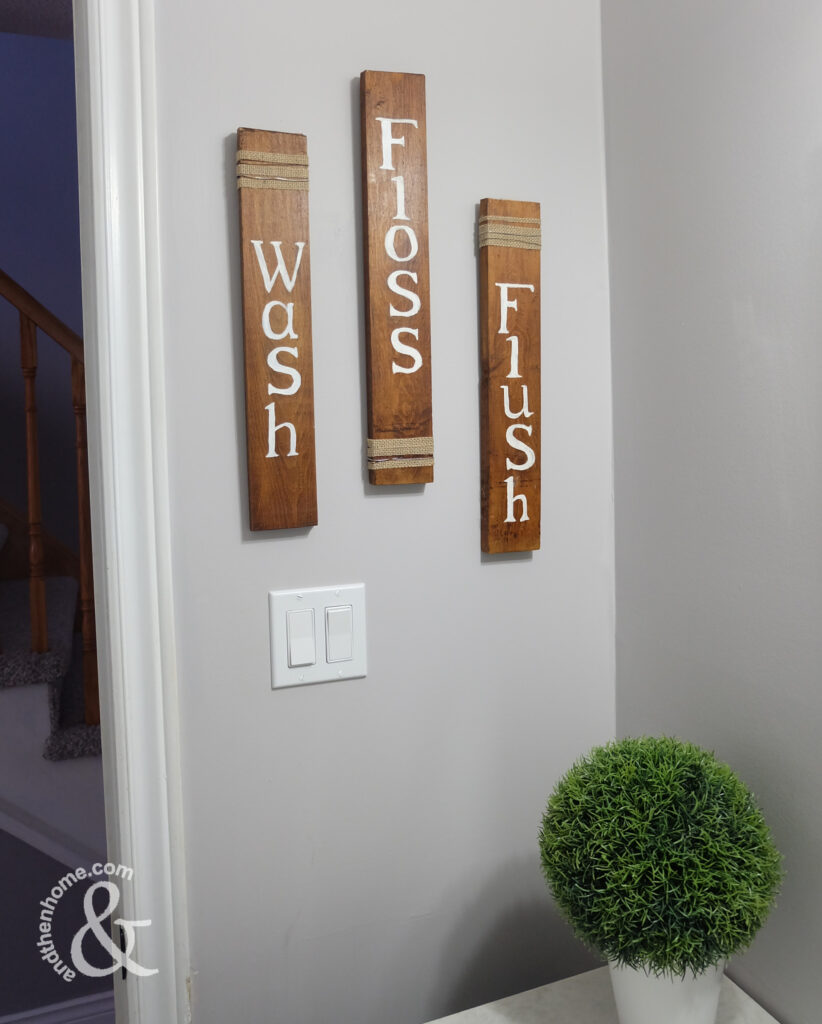
To keep this project under budget I wondered over to the Re-Store to see what they had. The great thing about shopping there is they give back to the community, and you can really find some DIY home project materials there! I lucked out and found this great piece of wood. It had been treated previously and had a few nicks, which in my opinion gives this wood some character. I did sand it lightly to help with minor imperfections and remove any sealer, then restrained it a shade darker. I’m happy with the results.
Keep reading for more, or scroll down to see the easy tutorial!
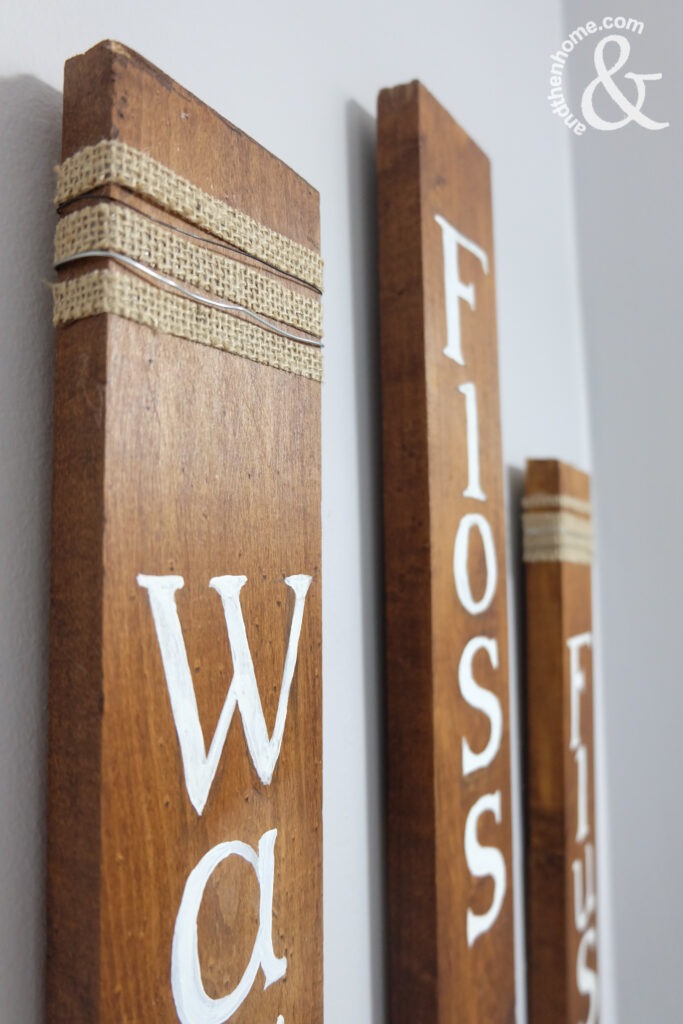
Once the stain was on, I added the letters. You can use a stencil for this, which would make it a lot easier…but I couldn’t find mine, part of the reno. So I had to free hand these letters. If you have to do the same, don’t press too hard with your pencil as the wood may be soft and mark easily. Once the letters were painted and dry, a quick top coat was applied for a finished look. Then I added my burlap strips and floral wire with a glue gun. Finally a hook was added to the back. Too much too fast?? Let’s take a look at the tutorial!
How to create a Fun and Cheap Rustic Bathroom Sign
What you’ll need:
- Three pieces of wood, they don’t have to be the same size!
- Sanding paper
- Wood stain
- White acrylic paint
- Letter stencils or a pencil
- Twine, burlap and/or floral wire
- Glue gun
- Scissors
- Wall plaque hangers
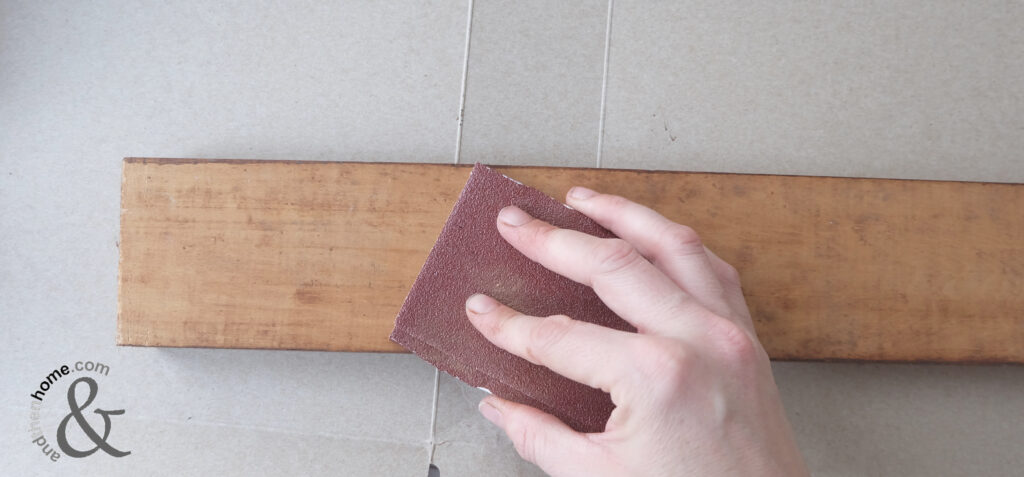
Step 1. If your wood has been previously treated, give it a light sand to remove any shiny sealer…otherwise your stain or paint will go on unevenly.
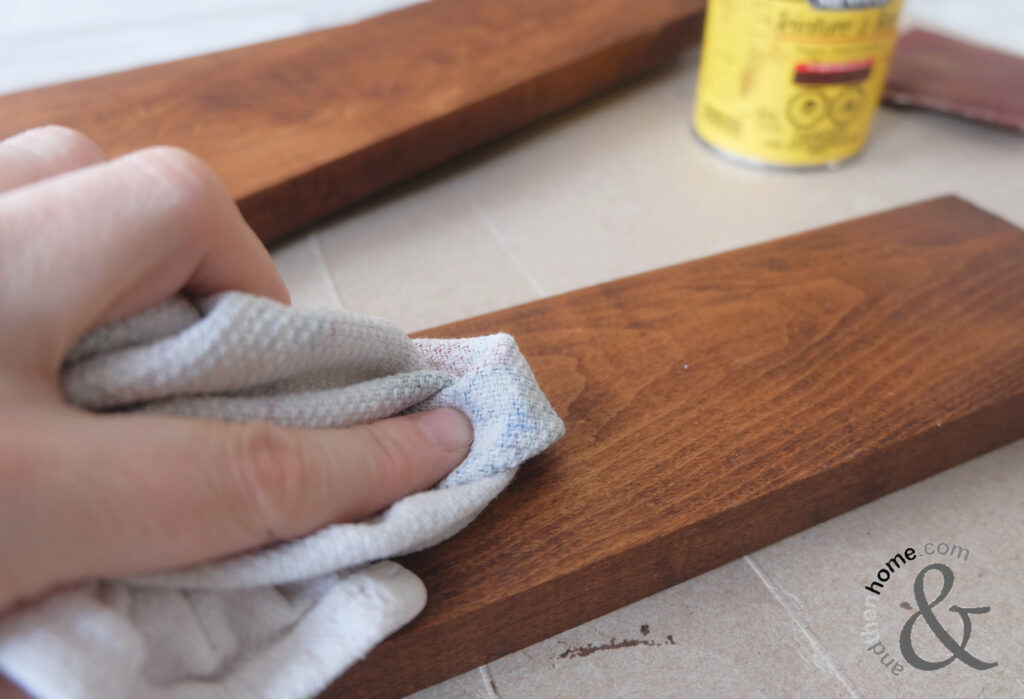
Step 2. Stain your wood using an old cloth or stain rag. Apply each coat according to the manufacturers label. Apply as many as needed. I only used a small amount of stain and really spread it with the rag.
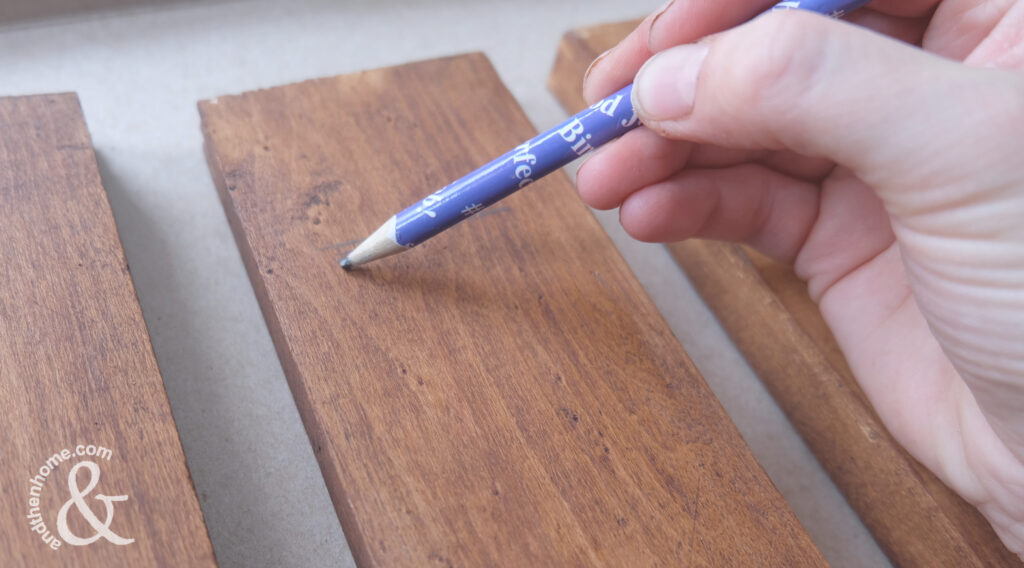
Step 3. Paint your letters. I recommend using a stencil to make life easier, or you can free hand them.
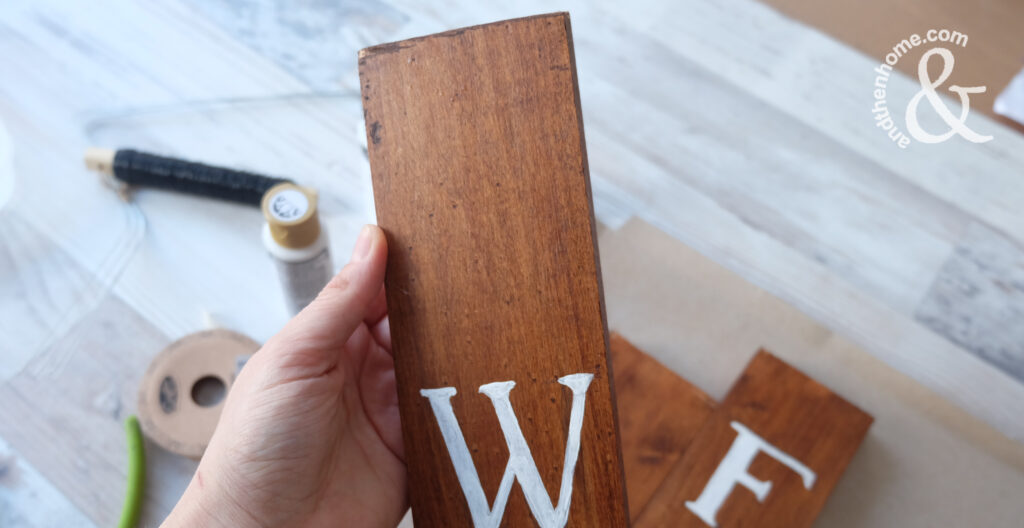
Step 4. Apply a top coat for protection. I used a mat spray on sealer, anything shinier could clash the rustic look.

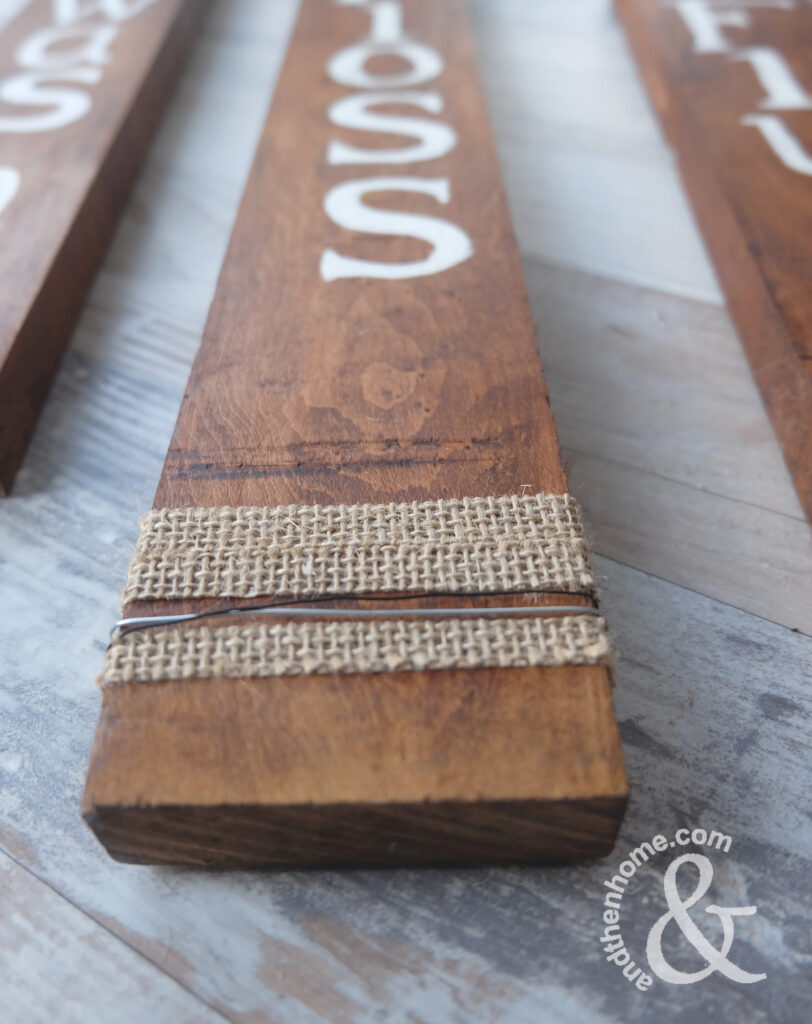
Step 5. Once the top coat is try, you can add any embellishment you’d like. I used a glue gun to adhere the burlap strips. I recommend twine or burlap as it’s the best of the rustic look. You could also consider adding some metal elements as that is very in trend right now!
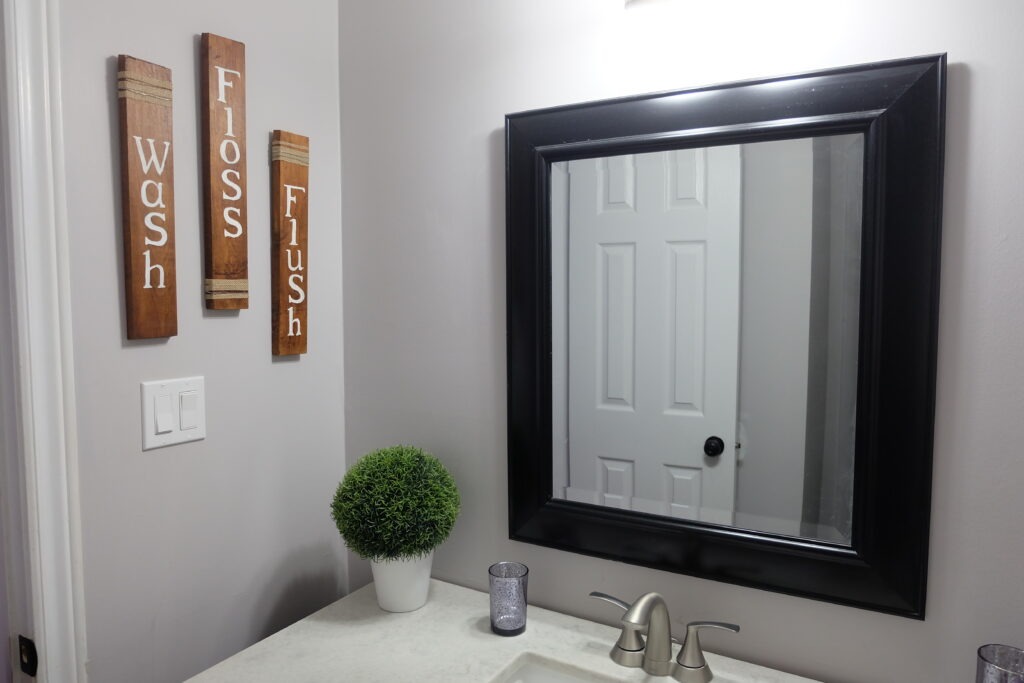
There you have it! We hope you loved this Fun and Inexpensive Rustic Bathroom Sign as we do!. Need ideas for other rooms too? See our list of Top 10 DIY Home Decor Projects


2 Comments
Darb
These rustic signs are great, they would look great when staging houses. Thank you!
Vicki
So glad you enjoy them, that is a great idea!