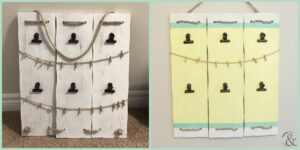
DIY Easy Kids Art Display
To help kick off our new look, I’m bringing us a fun and trendy DIY Home Decor piece for your littles’ art work! With three girls we are starting to collect a ton of art and with back to school coming, it’s the perfect time to add a personalized art display rack to the house. After looking for ideas for kids art display, I finally decided to make one! I’m excited to show you how it came together so you can make one too. First, let’s take a look at the materials needed to complete this DIY Easy Kids Art Display.
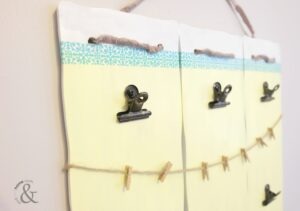
I happened to find this beauty at a garage sale this summer so the hard part has already been done…in that it’s already whole! You could potentially make this from scratch. Find some light wood planks at the local dollar store, drill some holes and attach then with ribbon or rope (like they did on mine). You could also use some thin barn board. BUT for this project, our piece is already set up! You’ll need some paint, brushes, tape, paint pens (see our review here), washi tape, ribbon, screw driver and glue.
DIY Easy Kids Art Display
Here’s the how to!
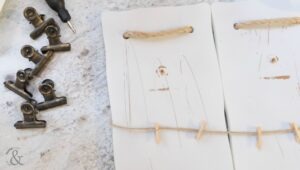
Step 1. Firstly, remove all the hardware from the board. I used a screwdriver and a tiny bit of force to pull them off as they were glued. Then I pulled off the twine that holds the mini clothes pegs, these were held on by hot glue.
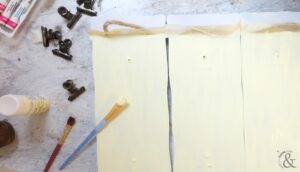
Step 2. Secondly, you’ll need to paint your boards. You can use spray paint if you like, it will give a solid look thats fast and easy. Just be sure to cover the existing rope with some tape, or remove it altogether. I used a light yellow acrylic paint and left the top and bottom white. You’ll need at least two coats, waiting for the paint to dry completely between each coat.
Step 3. Once your paint is dry and you’re happy with the coverage the wording can be added. I recommend “Look What We Made” along the top of the boards. This is very easy to do when using paint pens! I highly recommend them. I will be adding my daughter’s names on the bottom of the board.
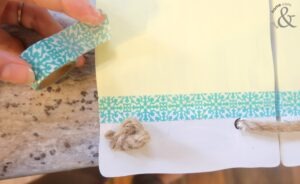
Step 4. Adding the washi tape is easy and adds a pop of colour. I added mine to each board on the top and bottom. Just stick it on. I also changed the rope to ribbon.
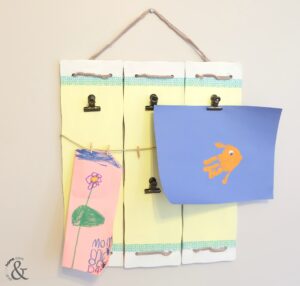
Step 5. Finally, we can replace the clips and twine. Screw them into the places they were removed from, and be sure to add a small amount of glue to the back of them. I only placed one of the twines back as I wanted to have a bigger space for any larger pieces of art work.
Ta-Da! DIY Home Decor!
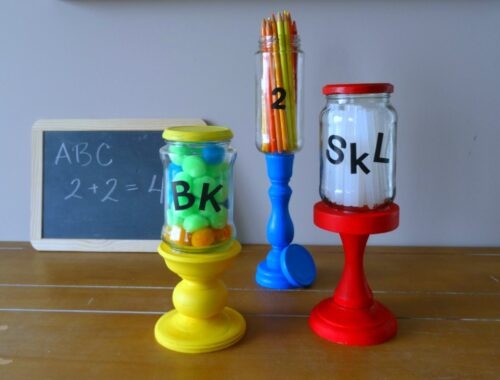
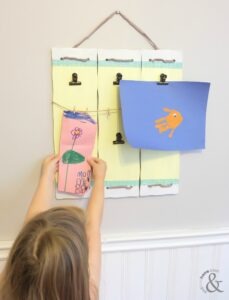
And that’s it! Your littles will be so proud to have their work displayed on this DIY Easy Kids Art Display! A special place for all their works of art! How did yours turn out? Any styling tips to share? I’ve always wanted to add one of these to my home and I’m happy I finally did! The girls love it. If you love this back to school decor, check out our new Back to School Up-Cycled Decor Jars! Or if you’re looking for some fun summery poolside decor the kids will love, certainly check out this Beach Decor Flip Flop Hanger!
Happy Crafting!
*Disclosure: Some of the links in this post are affiliate links. There may be a small commission made by our recommendations, and/or link to products mentioned or services on this website. Any potential purchase you make will help us continue to bring you amazing content, step-by-steps and product reviews. Products are not exact to what we use, be sure these materials are right for you!