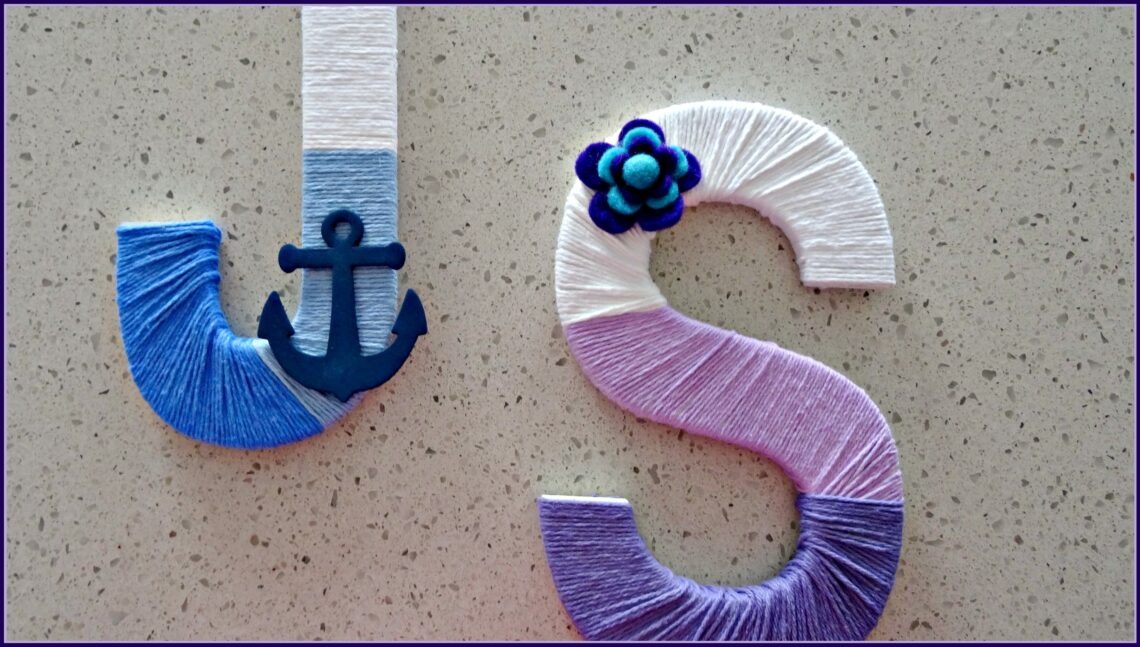
Ombre Yarn Wrapped Letters for Personalized Fun
This week we have another amazing DIY project to share with you – Ombre Yarn Wrapped Letters! I was inspired to make these easy décor pieces from all the beautiful examples I’ve been seeing on Pintrest and Etsy lately. They make adorable props for engagement and wedding photos; personalize any party display or are perfect in a baby’s nursery.
It no surprise that big letters are all the rage right now! This project could easily be a quicksie if you’re only doing one, straightforward letter (like I, O, T); you’ll be done in no time. However, if the letter you are wrapping has a lot of curves (like B, R, P), it will take longer and need a little bit more patience to get the yarn wrapped in a smooth way. If you are wrapping a more difficult letter, just take your time and use a little more glue spots on the back of the letter as you work your way around it.
Grab your scissors, some hot glue and a few balls of yarn and you’re ready to wrap!
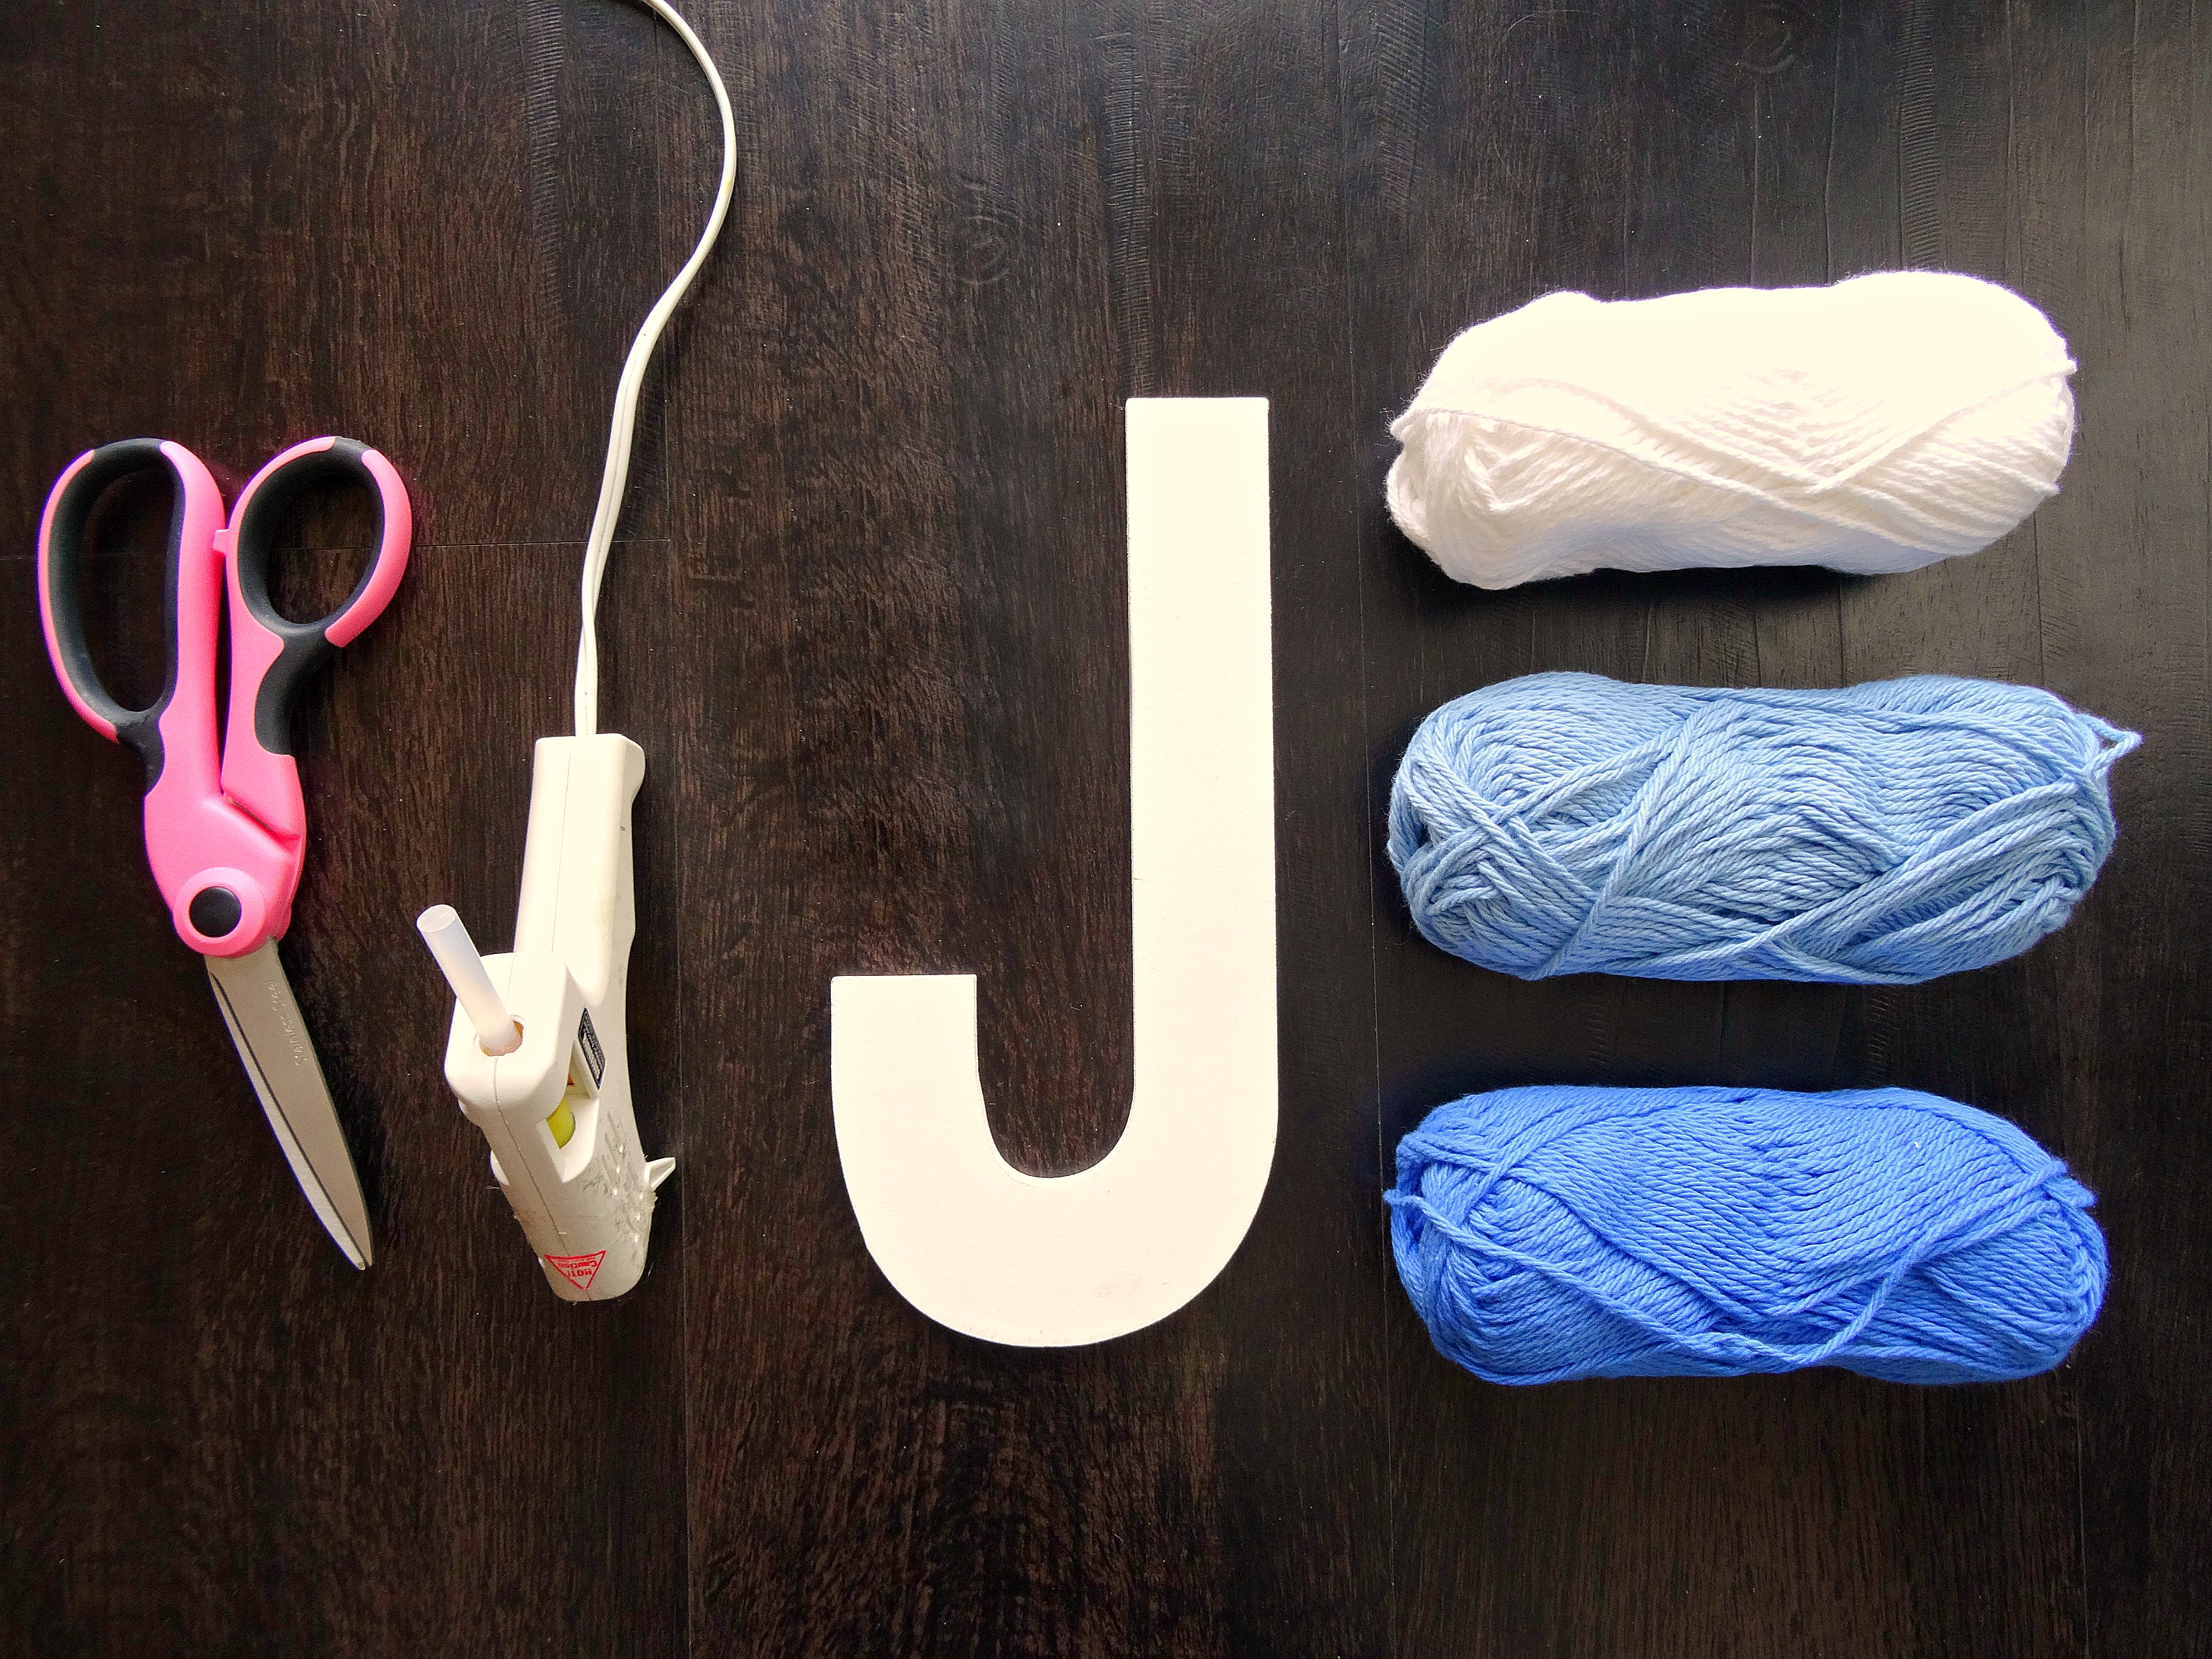
What You’ll Need:
- Wood or Cardboard Letter
- Yarn in three colours (ombre works best when you go from light to dark and you can definitely use more colours if you want)
- Hot Glue Gun and Sticks
- Scissors
- An Accessory of your choice (felt flower, wooden shape, etc)
Step One:
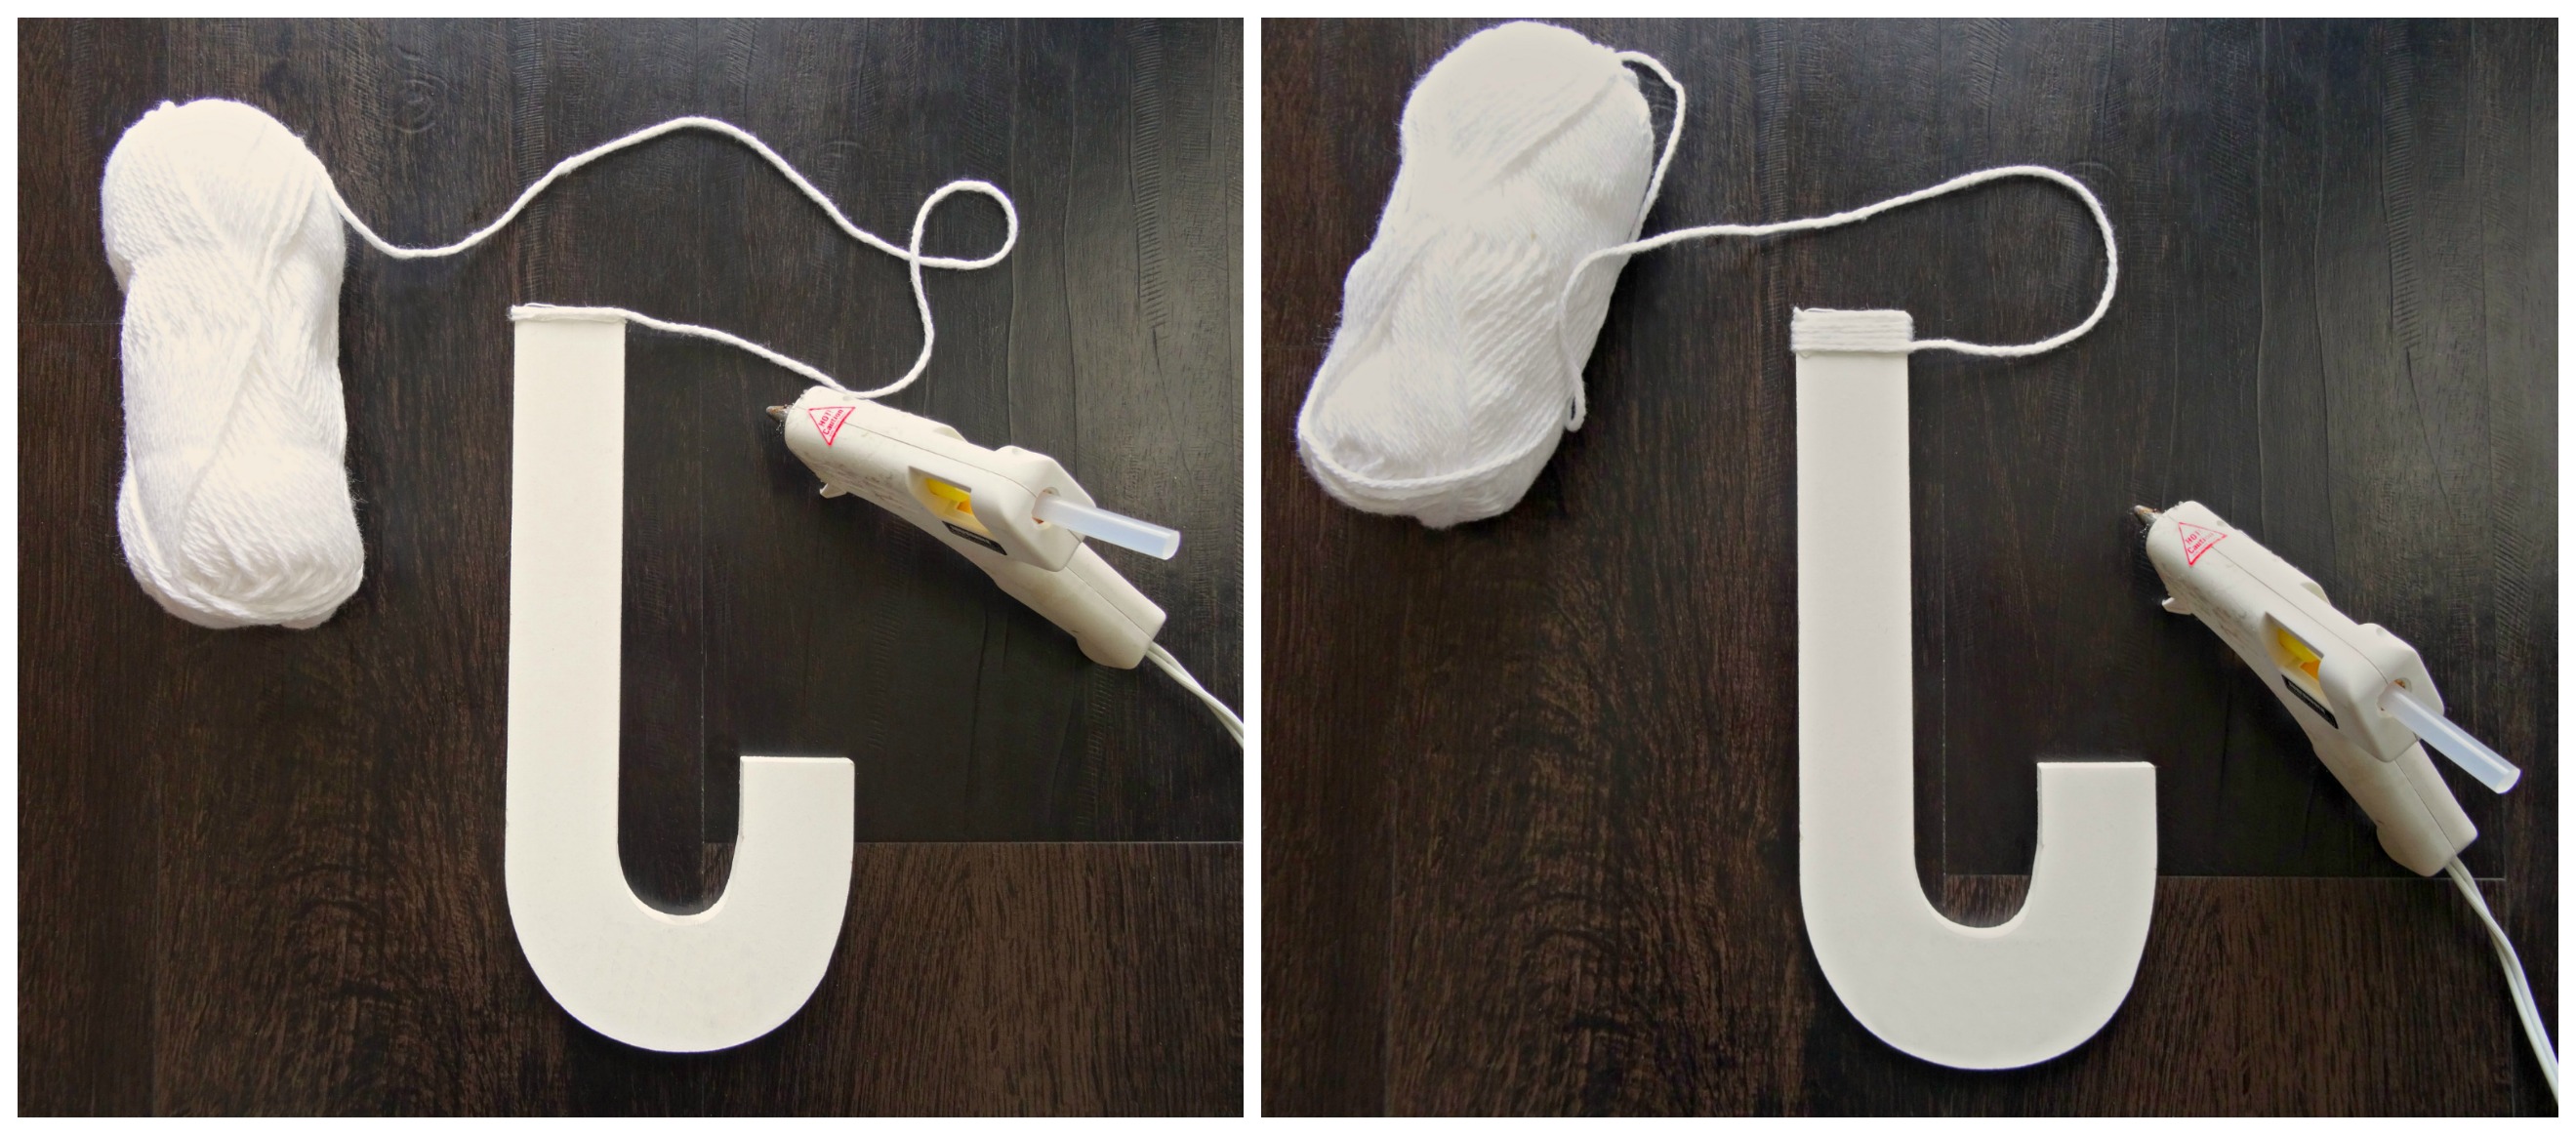
Start by putting a small line of glue on the back of your letter at the edge of the first section. Attach the end of the yarn to the glue. Begin to wrap the yarn around the letter, keeping the strands touching each other as you continue to wrap. After you have wrapped the yarn around the letter a few times, add another line of glue to secure the section you have already wrapped. Continue doing this until you have reached the point that you want to start your next colour. This should be a third of the letter if you are using three colours; a quarter of the way if using four colours; etc.
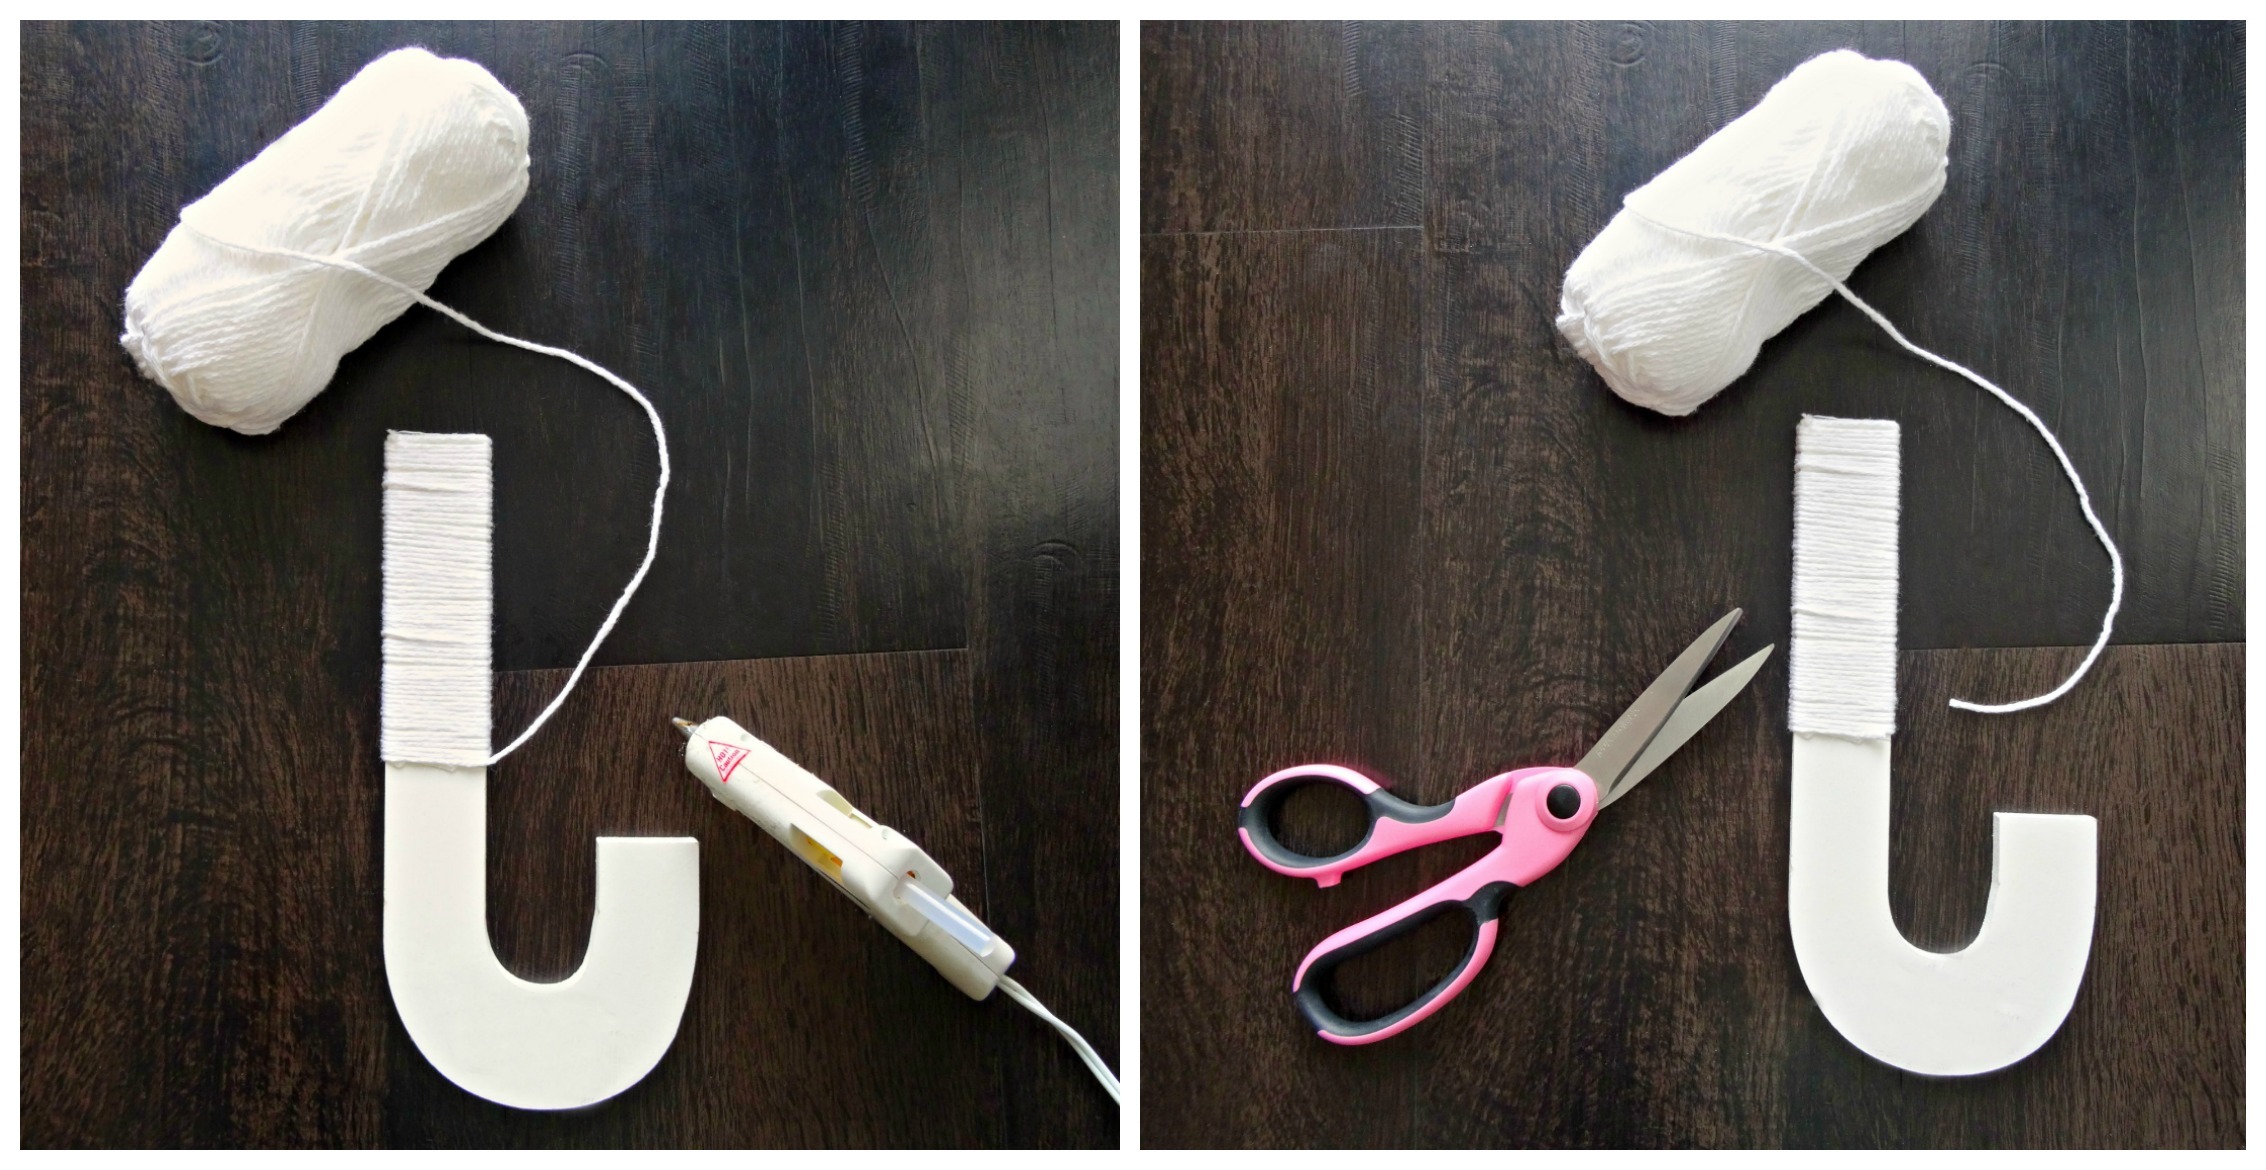
Add a line of glue at the point where you are switching to the new colour (always on the back of the letter) and secure the yarn here. Snip the yarn off as close as you can to where the glue is securing the yarn to the wood so that there is no tail left that would stick out.
Step Two:
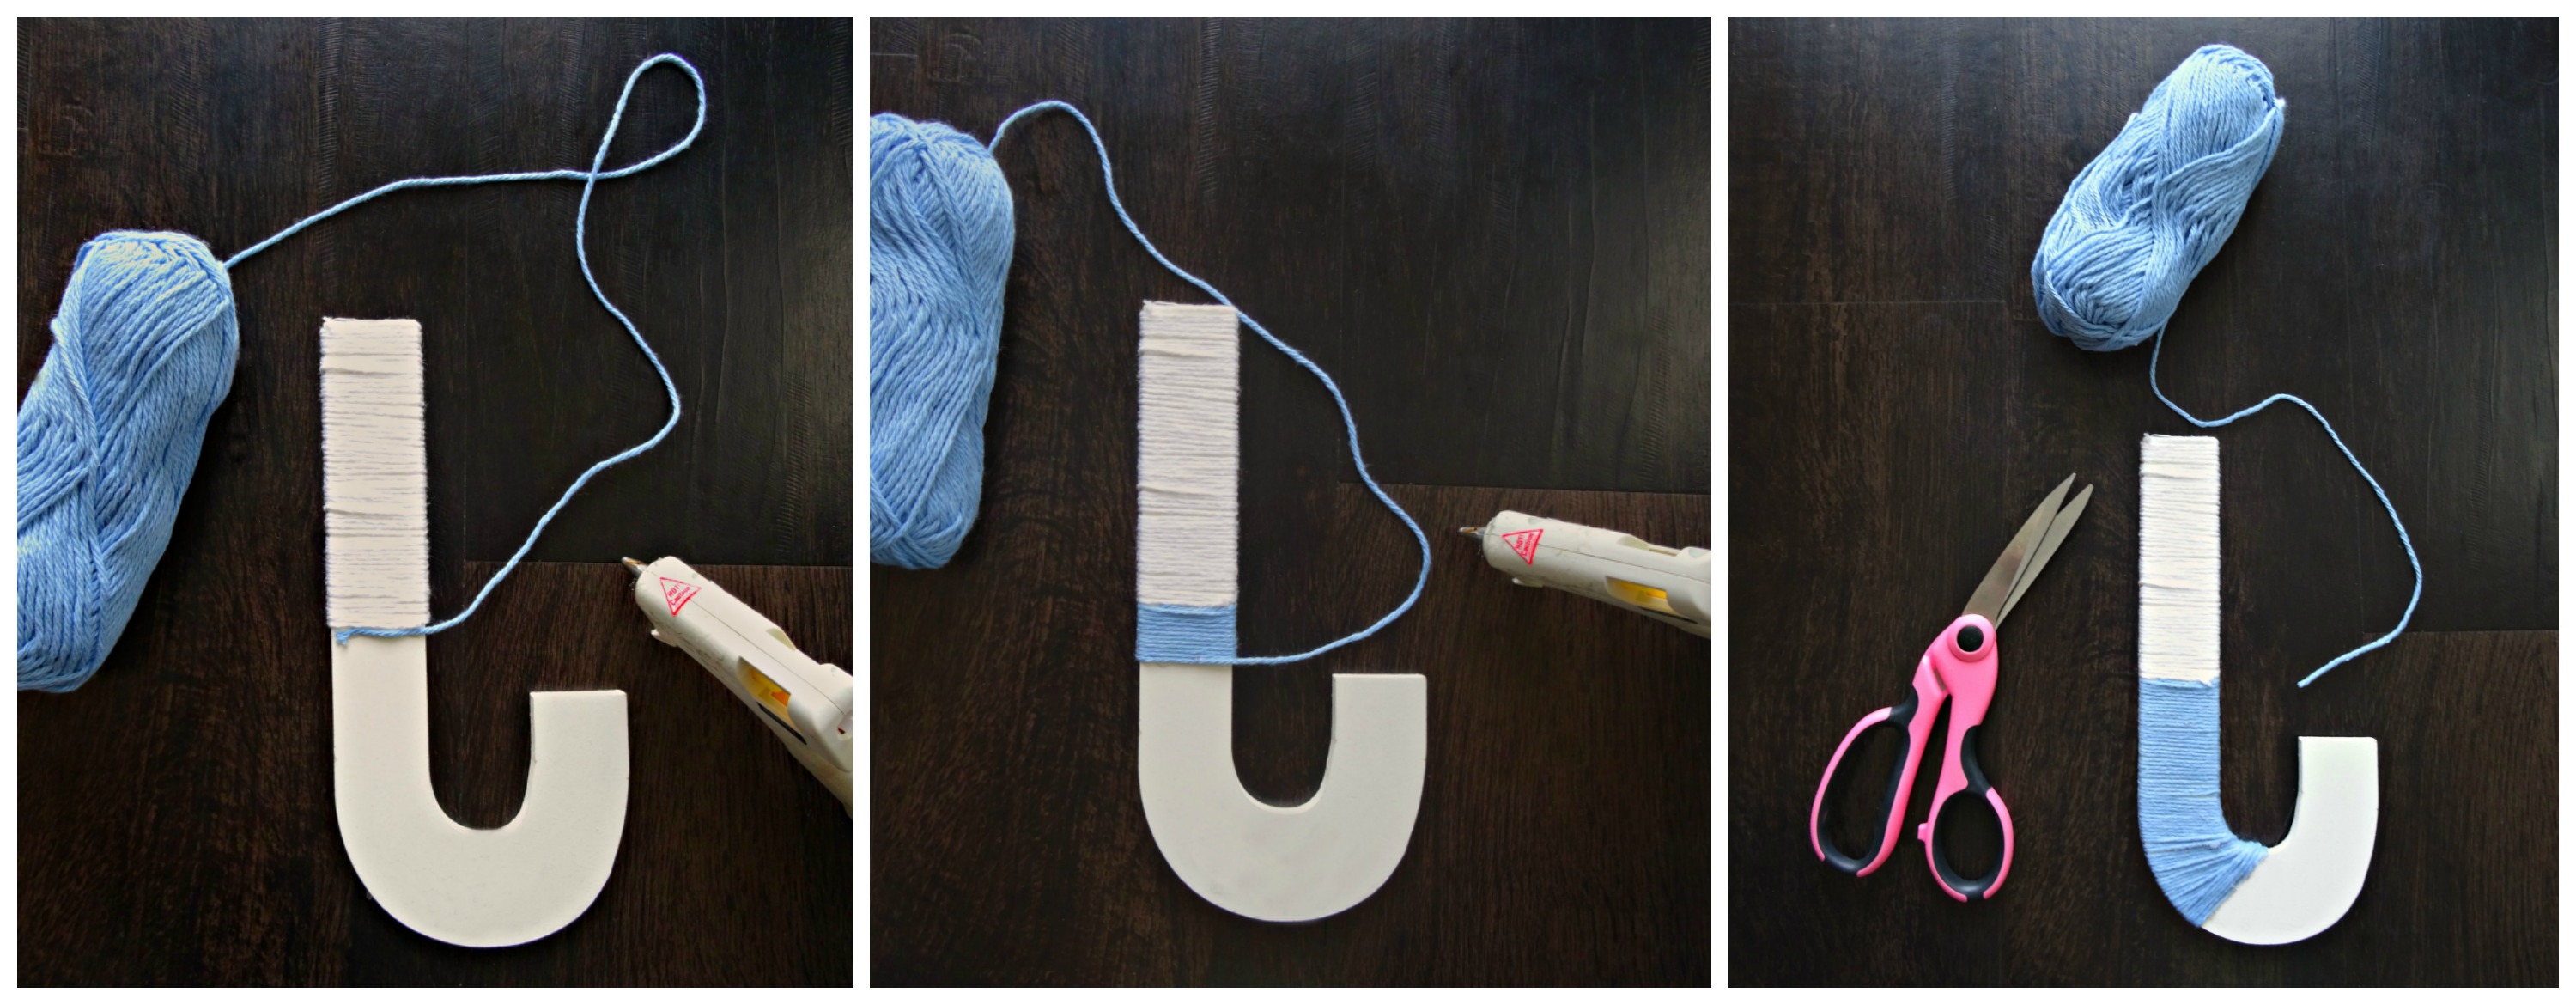
Repeat steps one and two in your next colour.
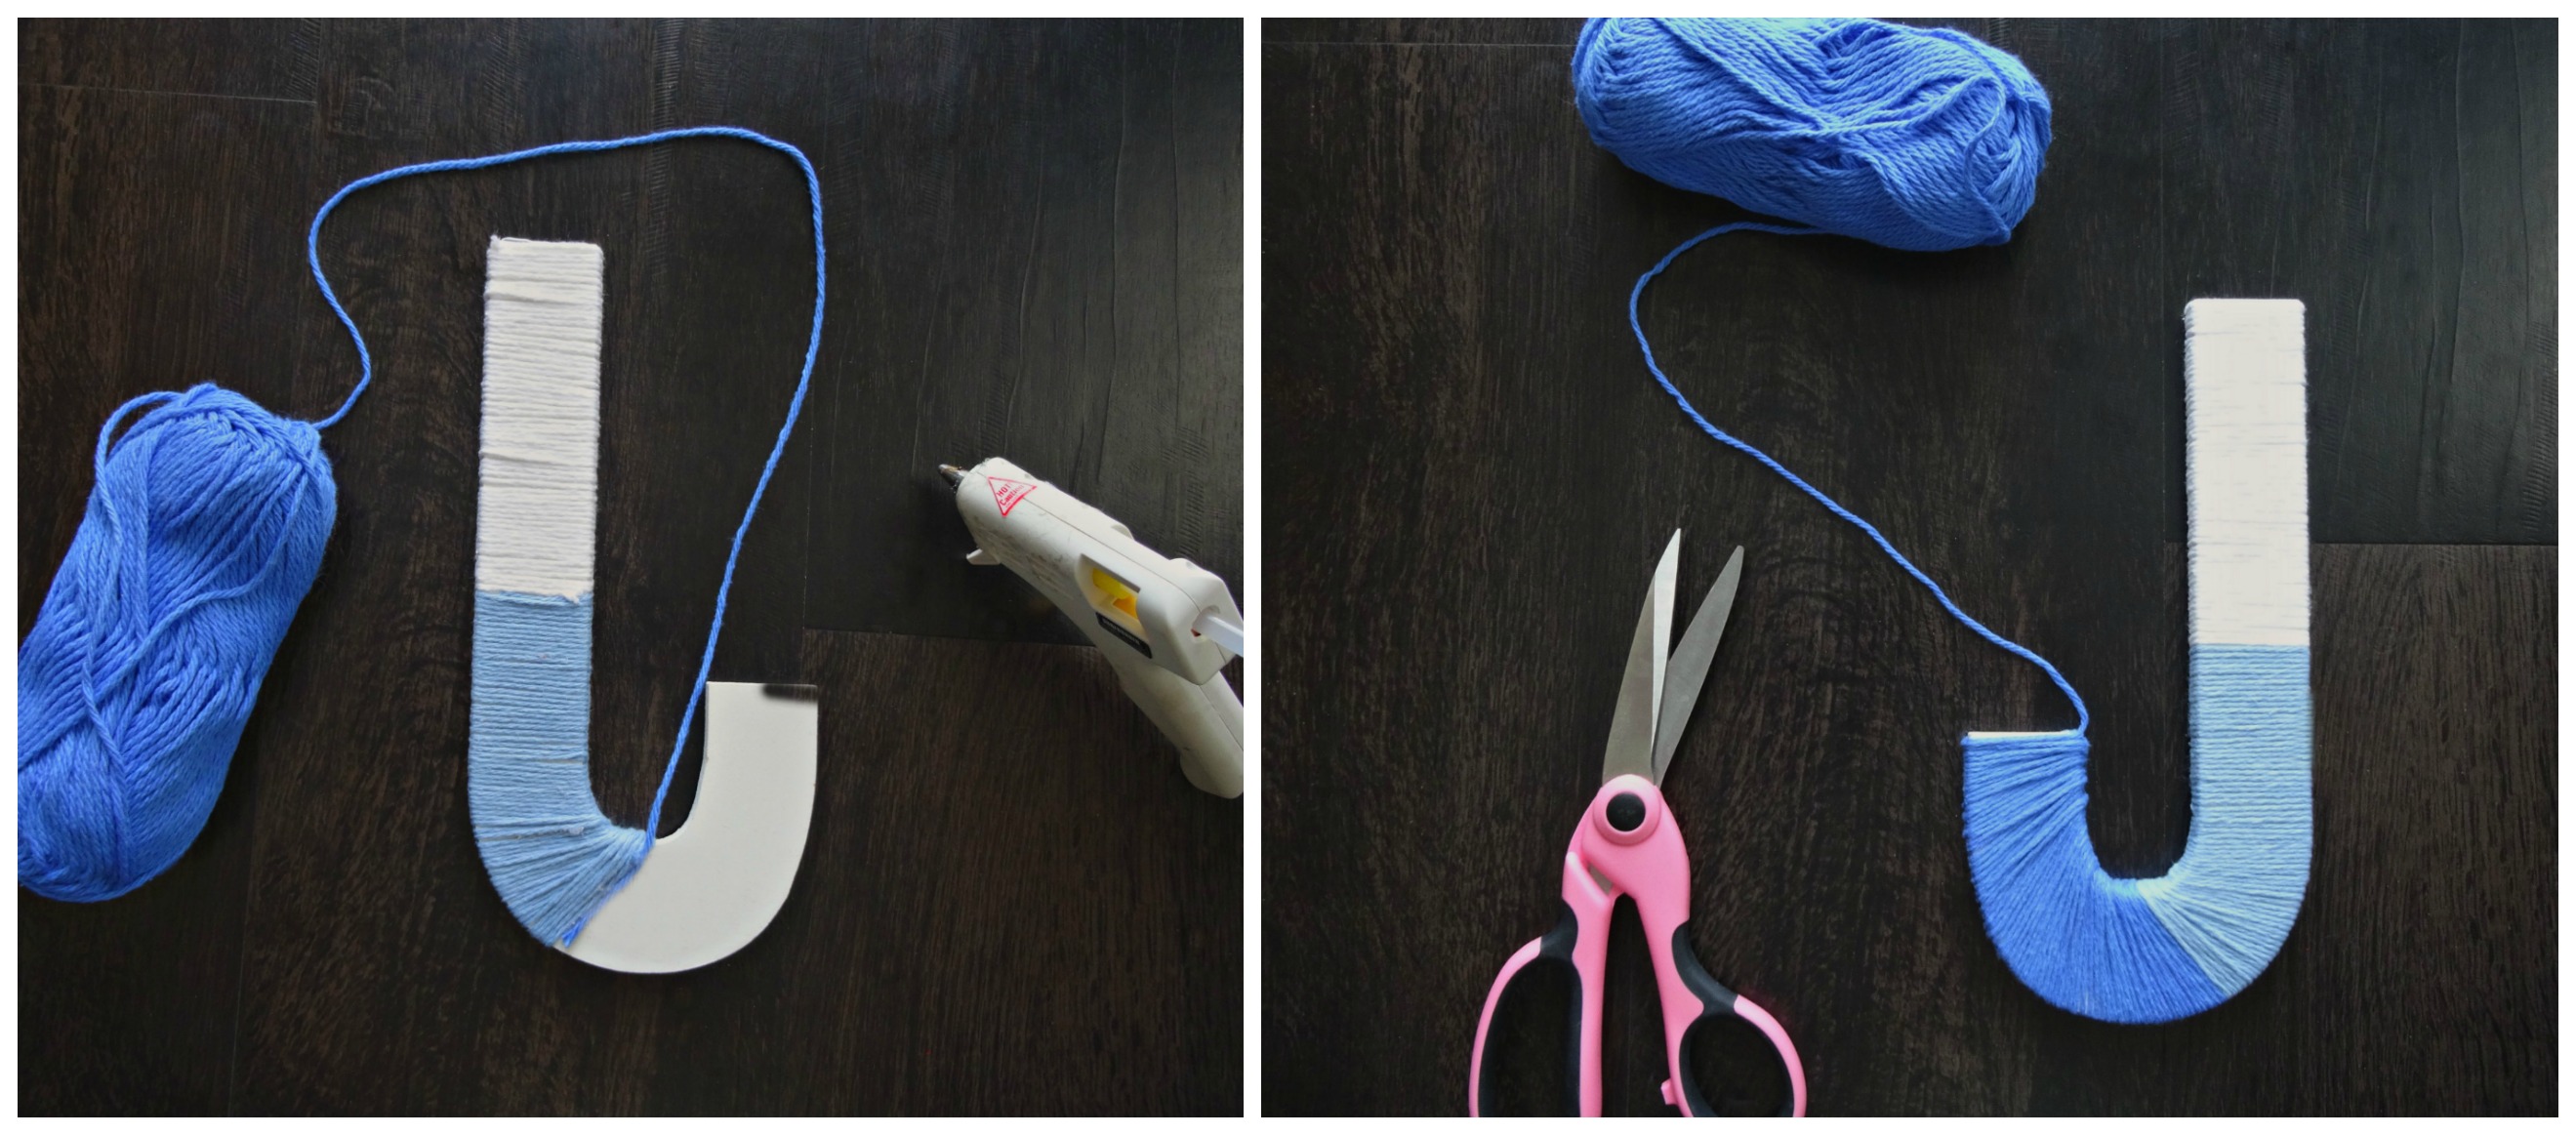
Repeat steps one and two again for the final colour. If you are using more than three colours, continue repeating steps one and two until you are complete.
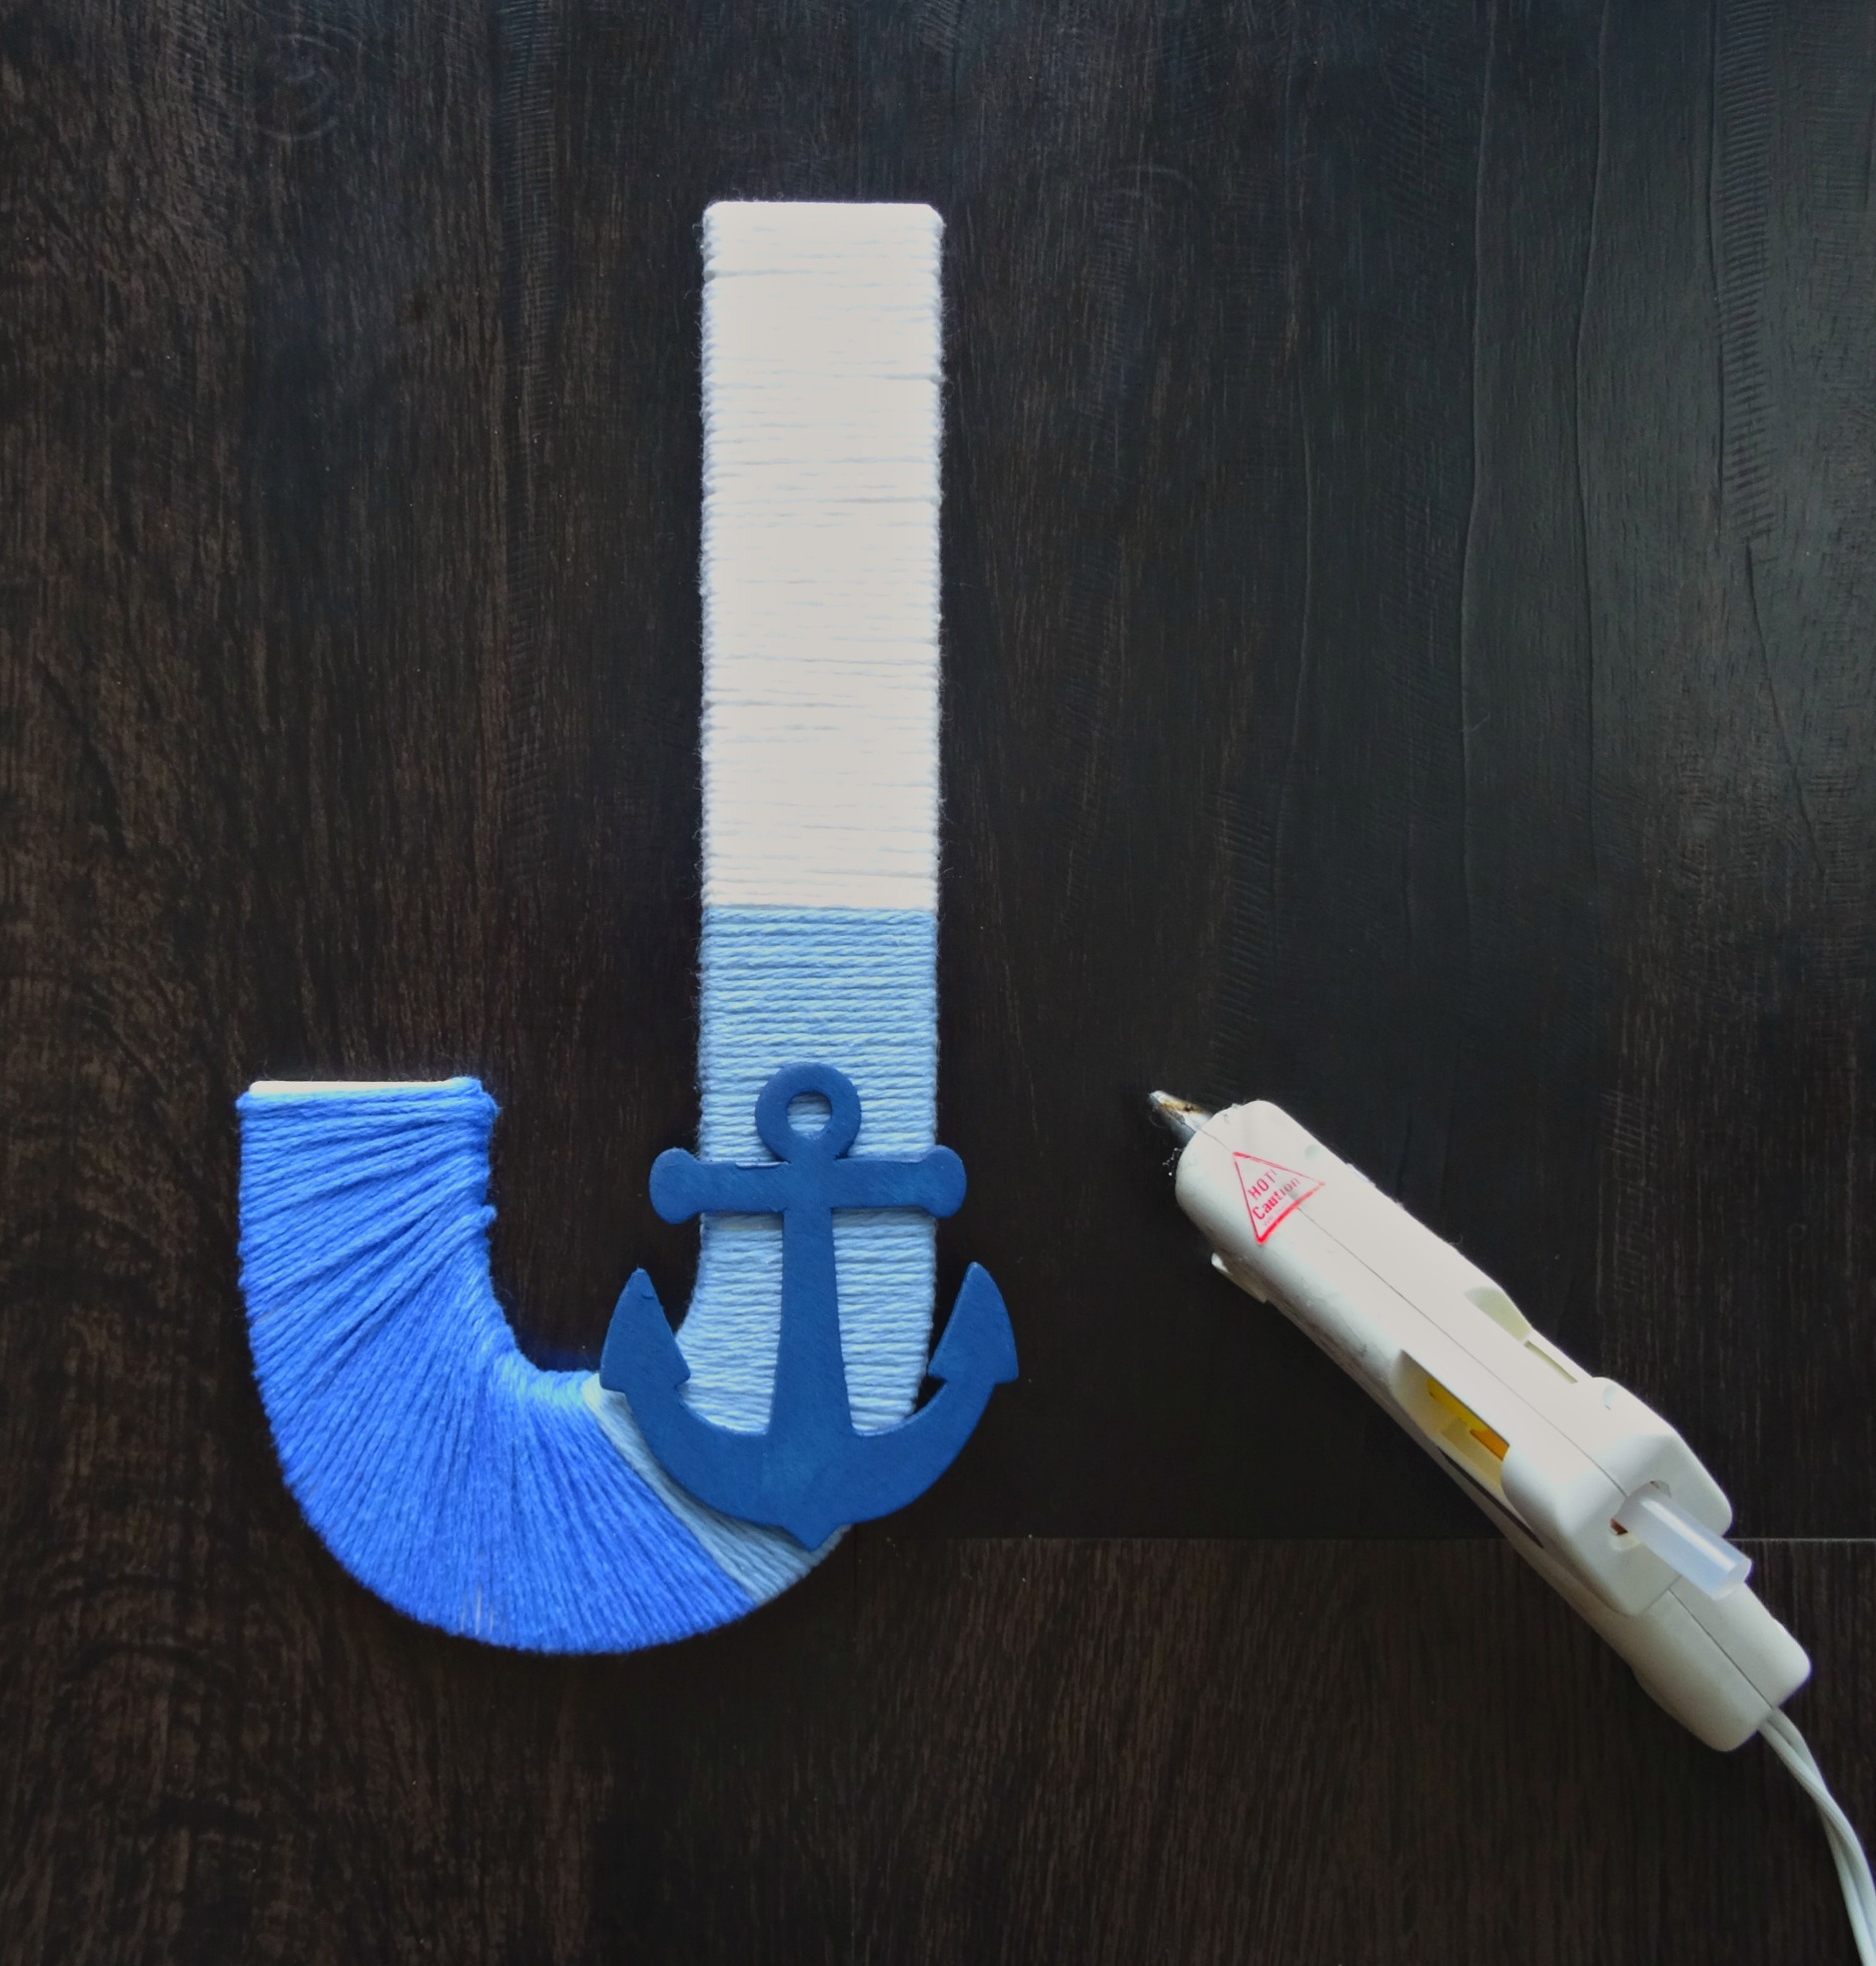
Attach your accessories to your wrapped letter. I used a wooden anchor on my letter J.
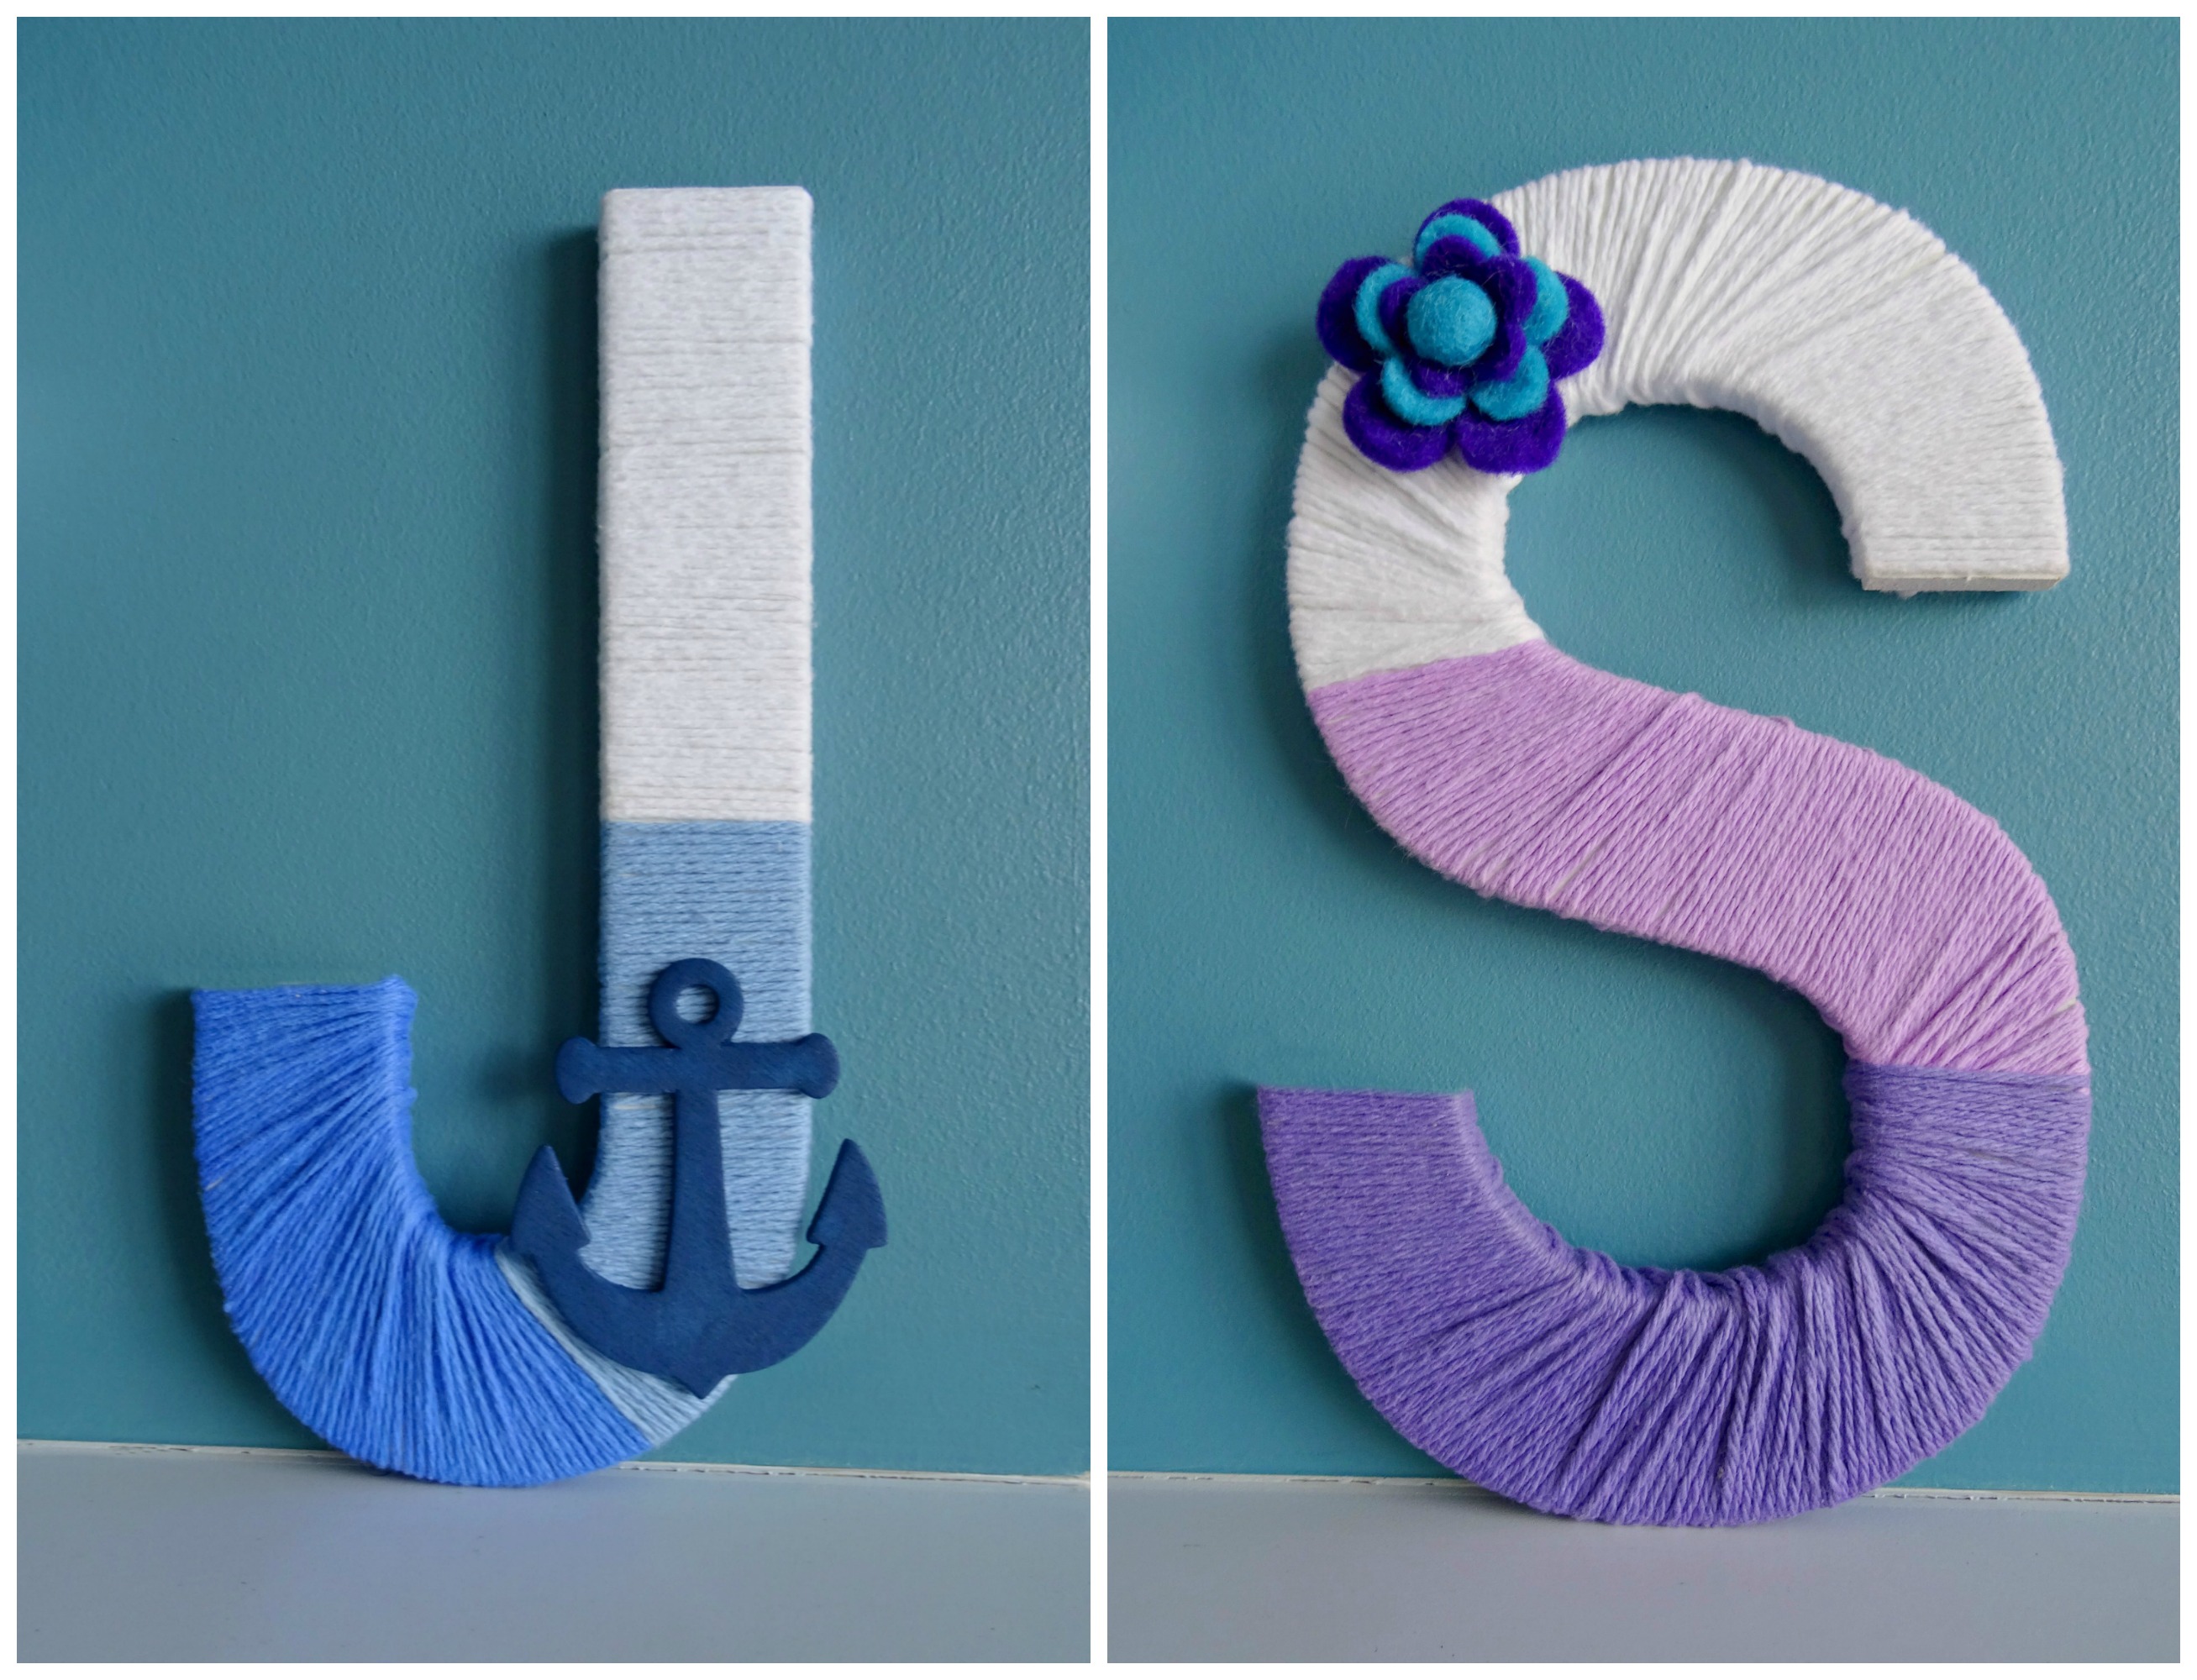
Easy and fun, you’ll be wrapping letters for everyone you know! I liked it so much I made a second letter in purple for a friend of mine who just had a baby.
Like these Yarn Wrapped Letters? Why not check out this quicksie: Easy and Impactful Clover Chair Sashes