DIY Wooden Porch Pumpkin Home Decor
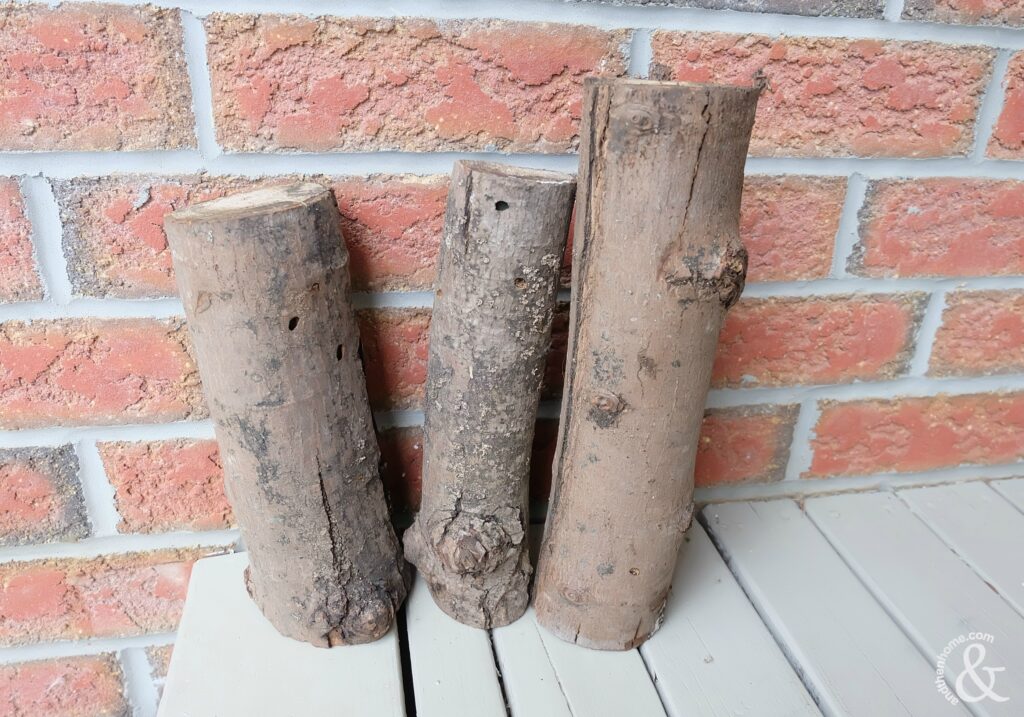
So, the time has come again….summer fun is fading, the days are noticeably shorter and the weather is cooler. BUT, this means we can welcome all of the fun fall decor!! Fall could be one of the best time for crafters and DIY’ers because we get to use materials, colours and themes we wouldn’t usually. Today I’m cracking out…and at some wood logs that I conveniently got from my neighbour. You can use any wooden log for this craft as long as it has a flat end to stand it on. On that note, let’s take a look on how to create a DIY Wooden Porch Pumpkin Home Decor
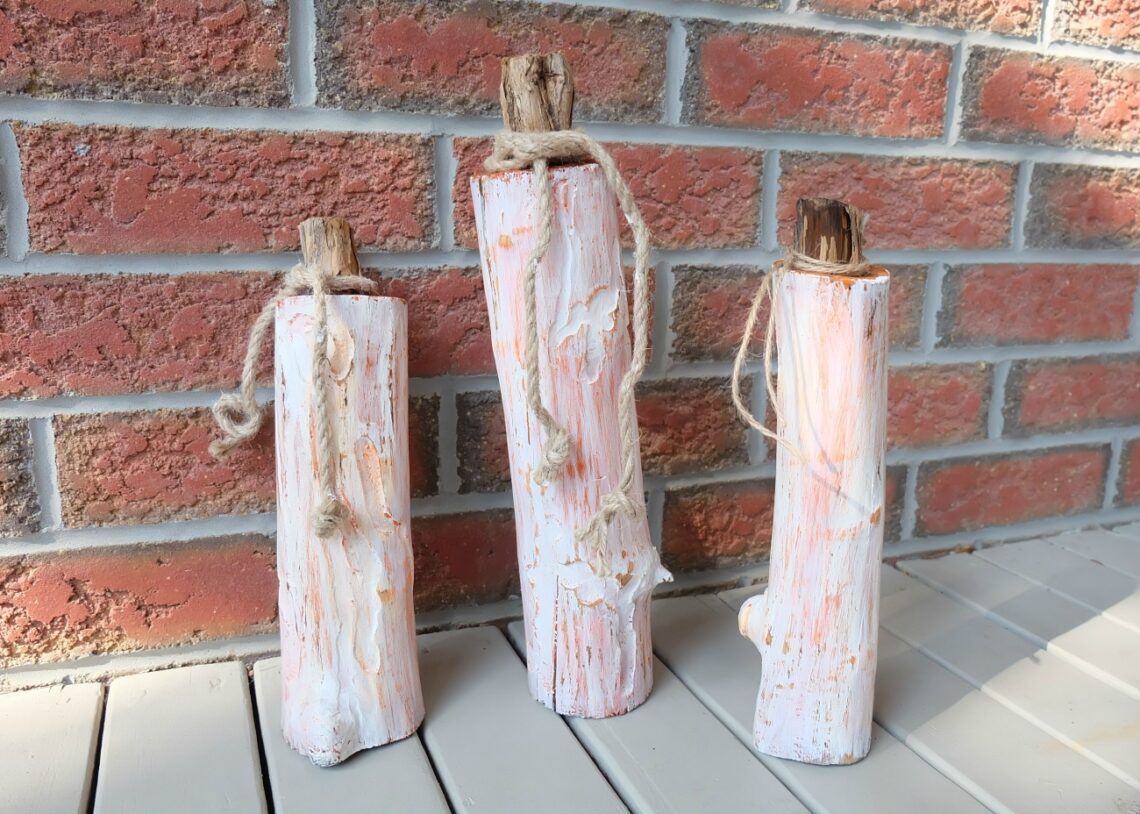
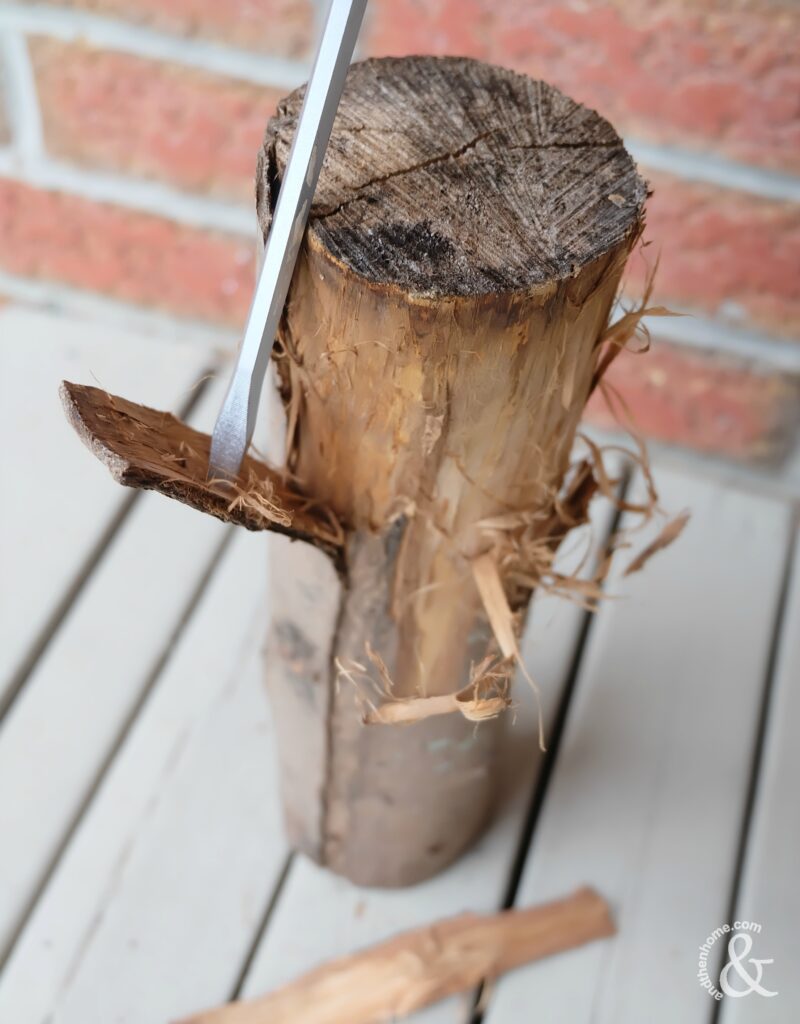
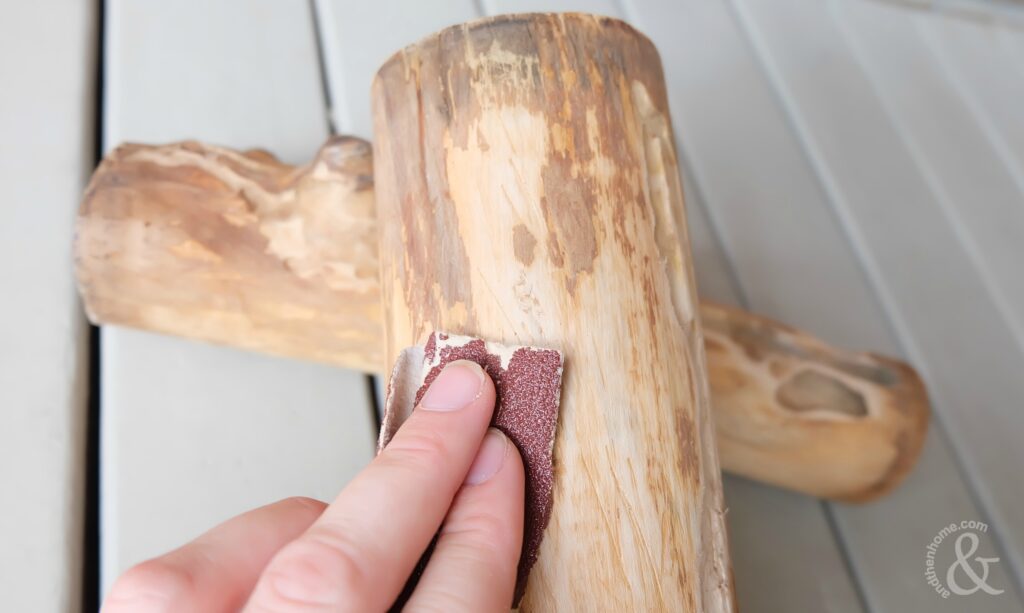
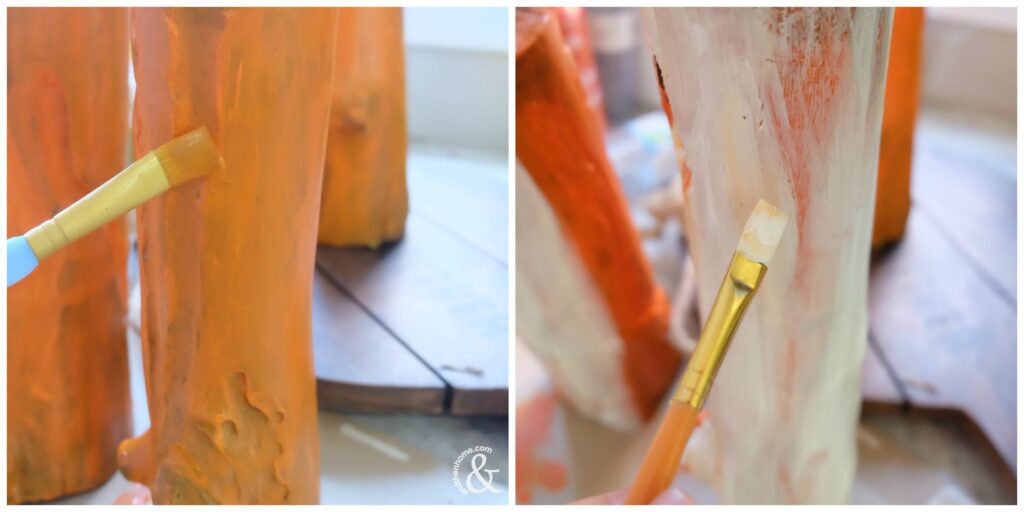
As I was saying, any log will do if it can stand by itself. The sturdier the better, so it doesn’t fall down easily, especially if you intend on having it on your porch like mine. You also want to pick a log that has bark that will peel off easier, this just makes life easier and also won’t damage the underlying wood. Removing the bark is the hardest part of this project and the most tedious. Once the bark has been removed, it’s a matter of sanding down the rough parts. Any knots are good because it gives the project a natural look, which is nice. When the log is smooth and sanded you can begin to paint it. I used an orange paint because…Fall. I actually used three different colours for this project to create some depth and character but it would look just as nice with one colour.
Read on for the DIY Wooden Porch Pumpkin Home Decor tutorial!
What you’ll need:
- Three wooden logs, bark removed
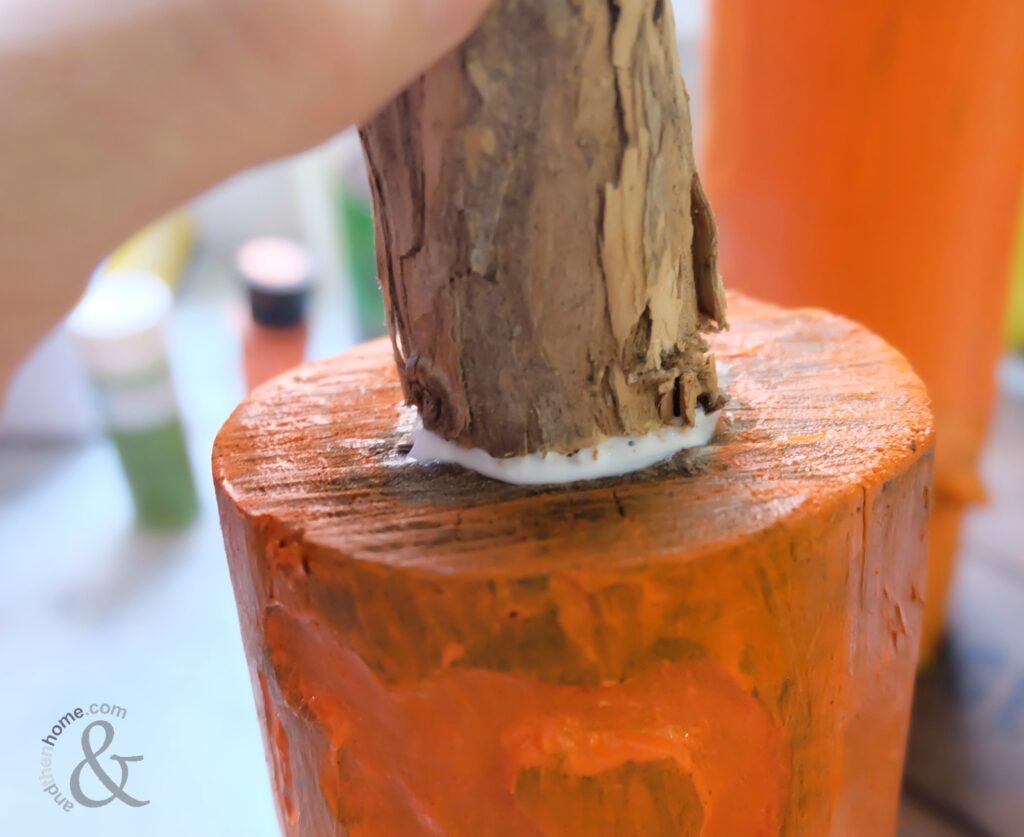
- A small branch cut into three (2-3inch pcs) to use as stumps
- Glue
- Sand paper
- Chisel or Flat head screwdriver
- Orange paint (one to three shades)
- White paint
- Paint brushes
- Finishing spray
- Embellishments (ribbon, burlap, etc)
Step 1.
First step is to peel the bark off of the log. A chisel is best for this (although I only had a flat head screw driver that worked nicely too). The bark can be a little stubborn so be careful! Also, it’s a lot messy so be prepared for that too.
Step 2.
Sanding. Sand all the areas down so it’s smooth, a little time consuming but worth it.
Step 3.
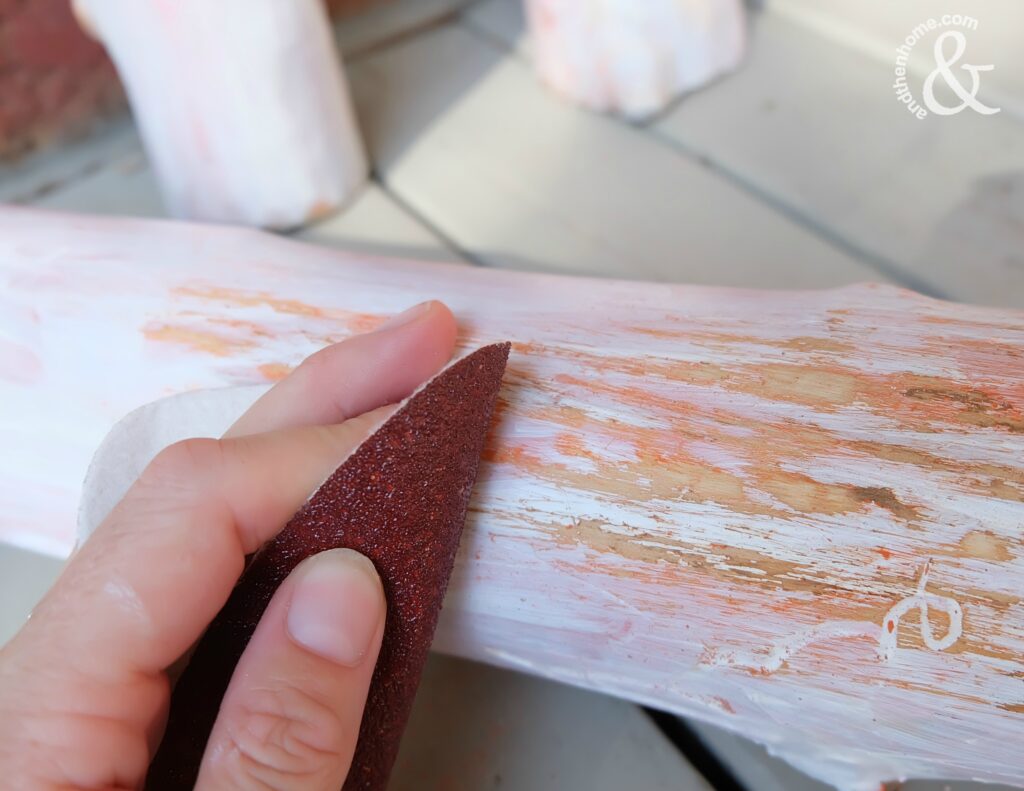
Now to paint. Paint each log orange first. You can use different shades for each log, or the same like I did. When the orange paint has dried completely, add a layer of white. Once the white paint has dried, take your sandpaper and gently rub it over the log. You will see that some of the orange paint starts to peak through. Rub as little or as much as you’d like!
Step 4.
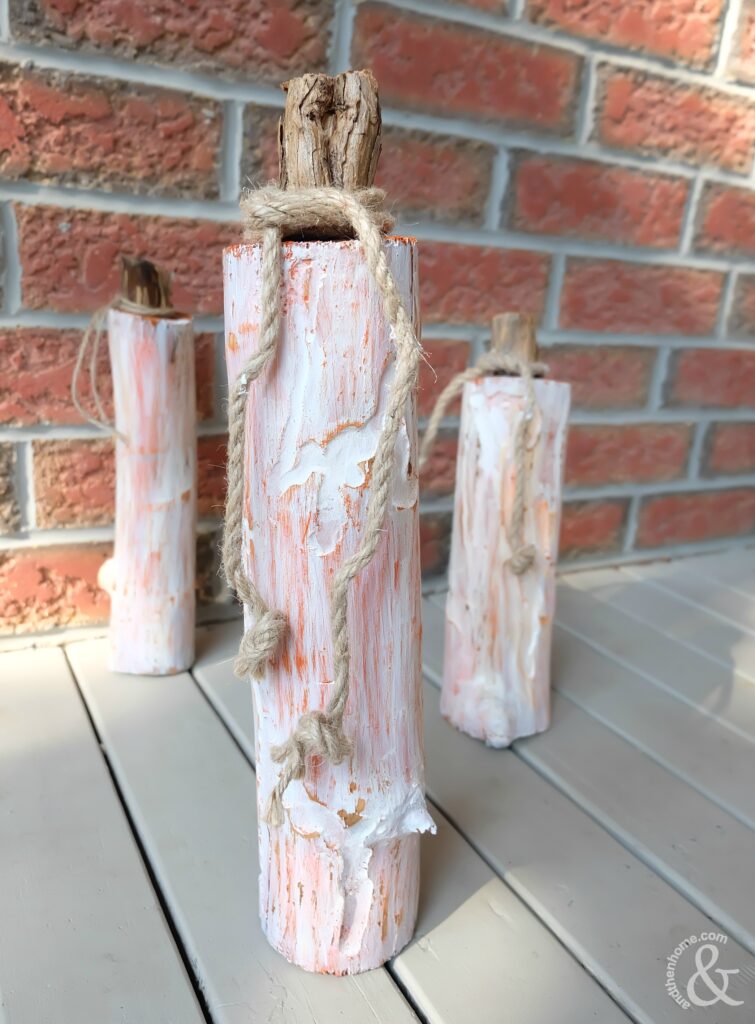
Glue your small ‘stumps’ onto the top of each log. This will create the pumpkin stump and give a finished look to the project! It really does make a difference.
Step 5.
Sealer. I used a spray sealer with a little shine to it. Give it two coats, allowing them to dry in between.
Step 6.
Add some twine, string, ribbon or burlap to the top. You can also add some metal pieces, a trend we are seeing this year is different types of materials being used in fall decor!
Ta-Da! Your DIY Wooden Porch Pumpkin Home Decor is finished.
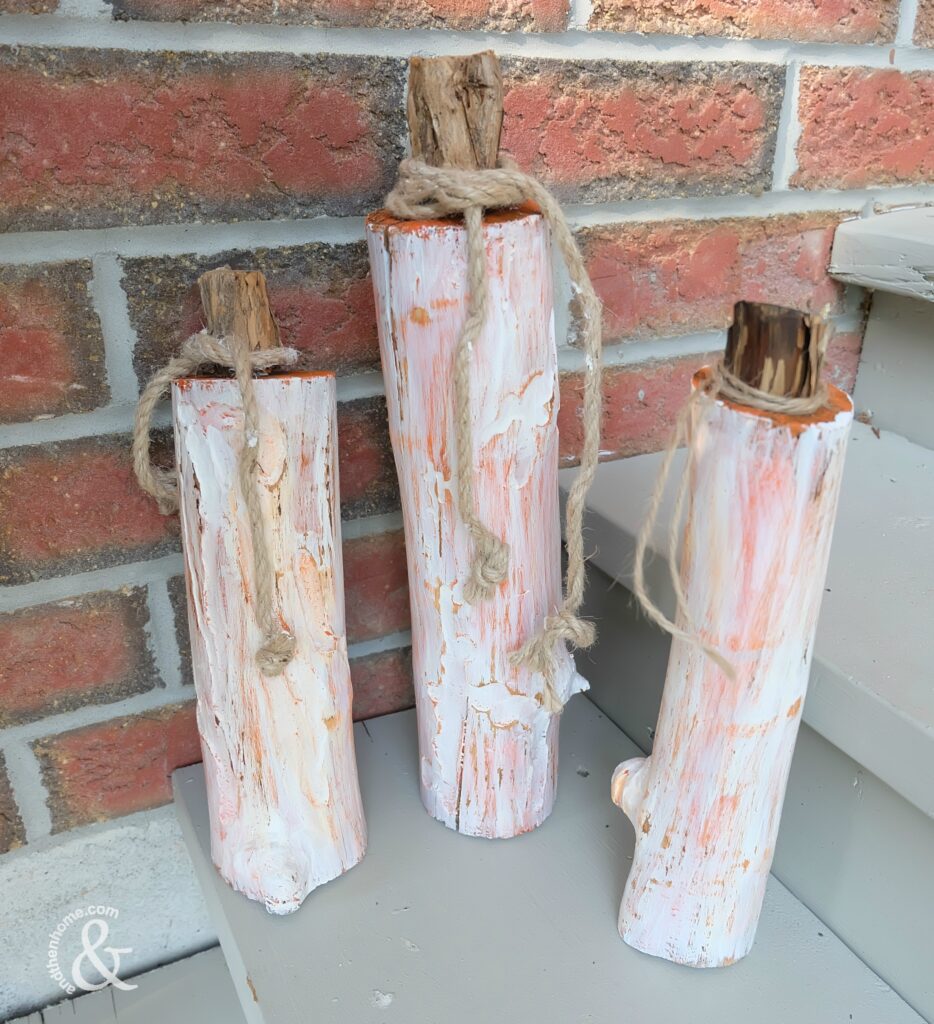
That’s it! Your fall decor is ready for your front porch, mantel or office. This DIY fall home decor project is definitely one of my favourites, it was fun to make with a bit of a challenge to it. Taking a piece from a raw condition and creating a decor piece was definitely worth it.
Looking for more decor for your home this fall? Check out these Rustic Painted Pine Cones and Acorns, for another hot trending craft idea.
Happy Crafting!
*Disclosure: Some of the links in this post are affiliate links. There may be a small commission made by our recommendations, and/or link to products mentioned or services on this website. Any potential purchase you make will help us continue to bring you amazing content, step-by-steps and product reviews. Products are not exact to what we use, be sure these materials are right for you!
Previous