Easy and Affordable Tomato Cage Patio Table
I was enjoying the summer weather on our balcony the other day, reading a book and sipping some white wine and realized something was missing. We had no table on the balcony. So, I put my book and my wine down on the floor and grabbed my tablet for some inspiration. That’s when I discovered the Tomato Cage Patio Table. I am not the first DIYer to create one of these tables; there are a few beautiful examples online.
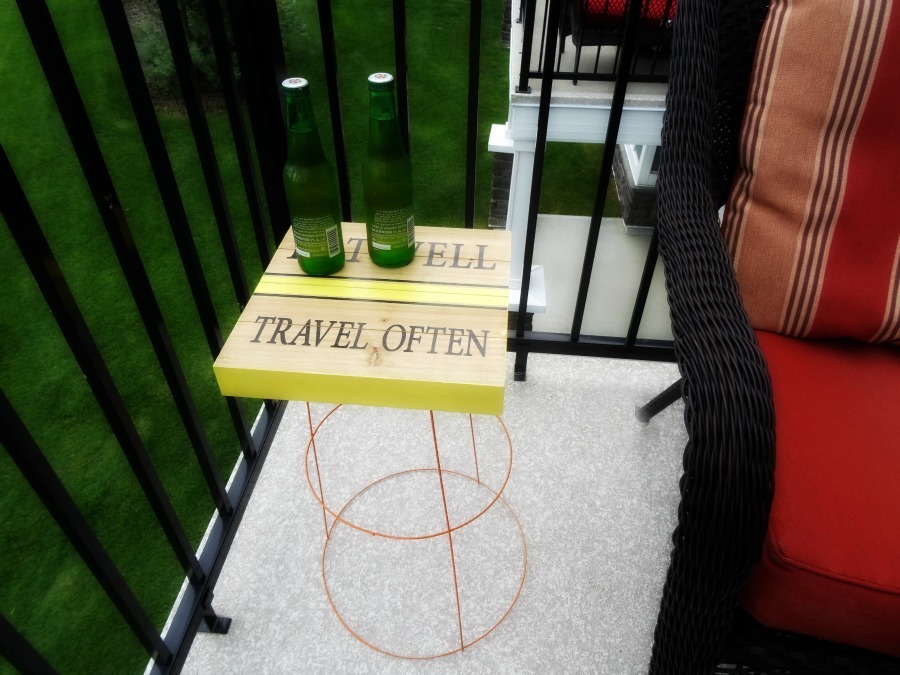
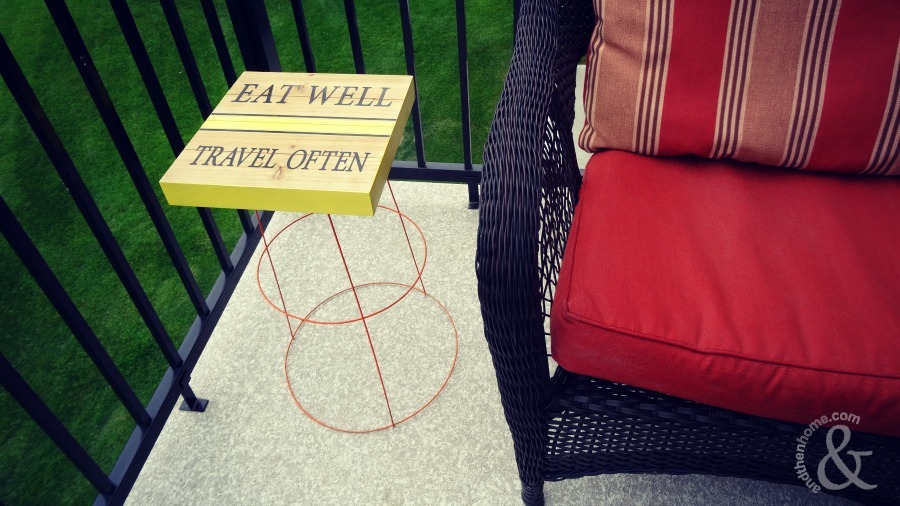
I put my own touch on my table by using a decorative sign that I found at a home décor store for the tabletop instead of a plain wood circle. You should feel free to use whatever catches your eye for your tabletop, just be sure to use something that you can screw into so you can attach the table ‘legs’. I also started with only one tomato cage but I found that I did need to add a second one for stability. An example of how this would look is from Holtwood Hipster – check out her table project here.
What You’ll Need:
- One or two tomato cages
- Spray Paint
- Strong wire cutters
- Tabletop
- Acrylic paint
- Spray on outdoor sealer
- Brackets and screws
- Screw gun
Step One:
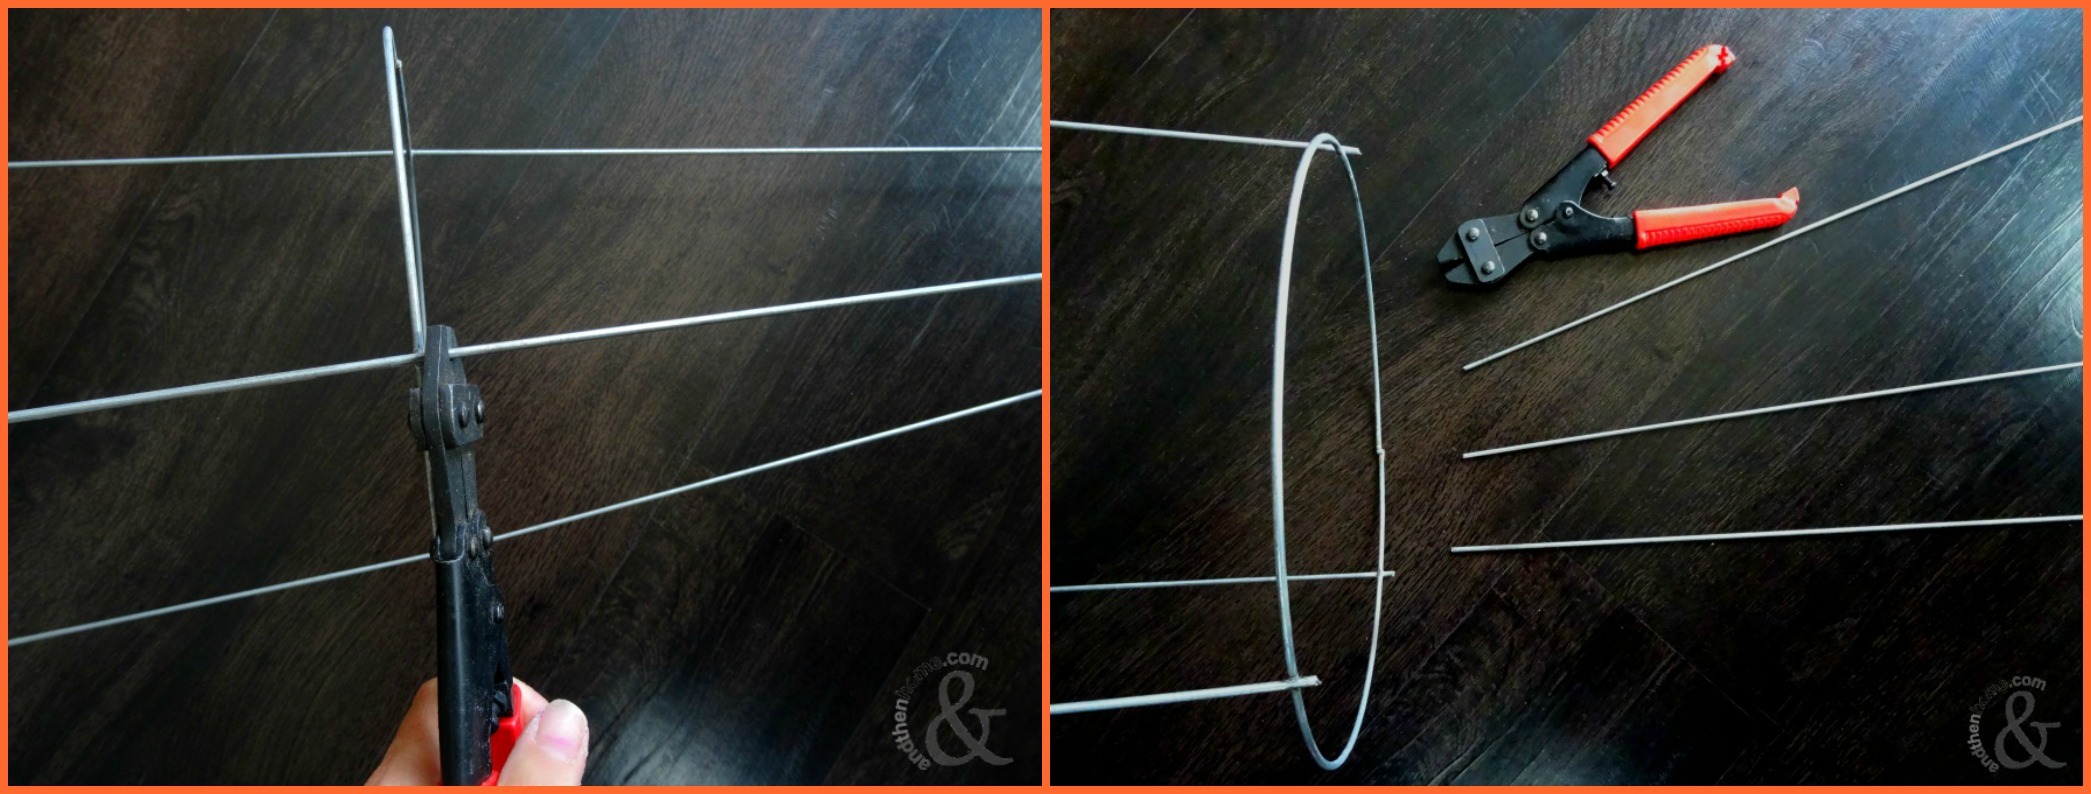
Use the wire cutters to cut the pieces of wire extending past the circles on the tomato cage.
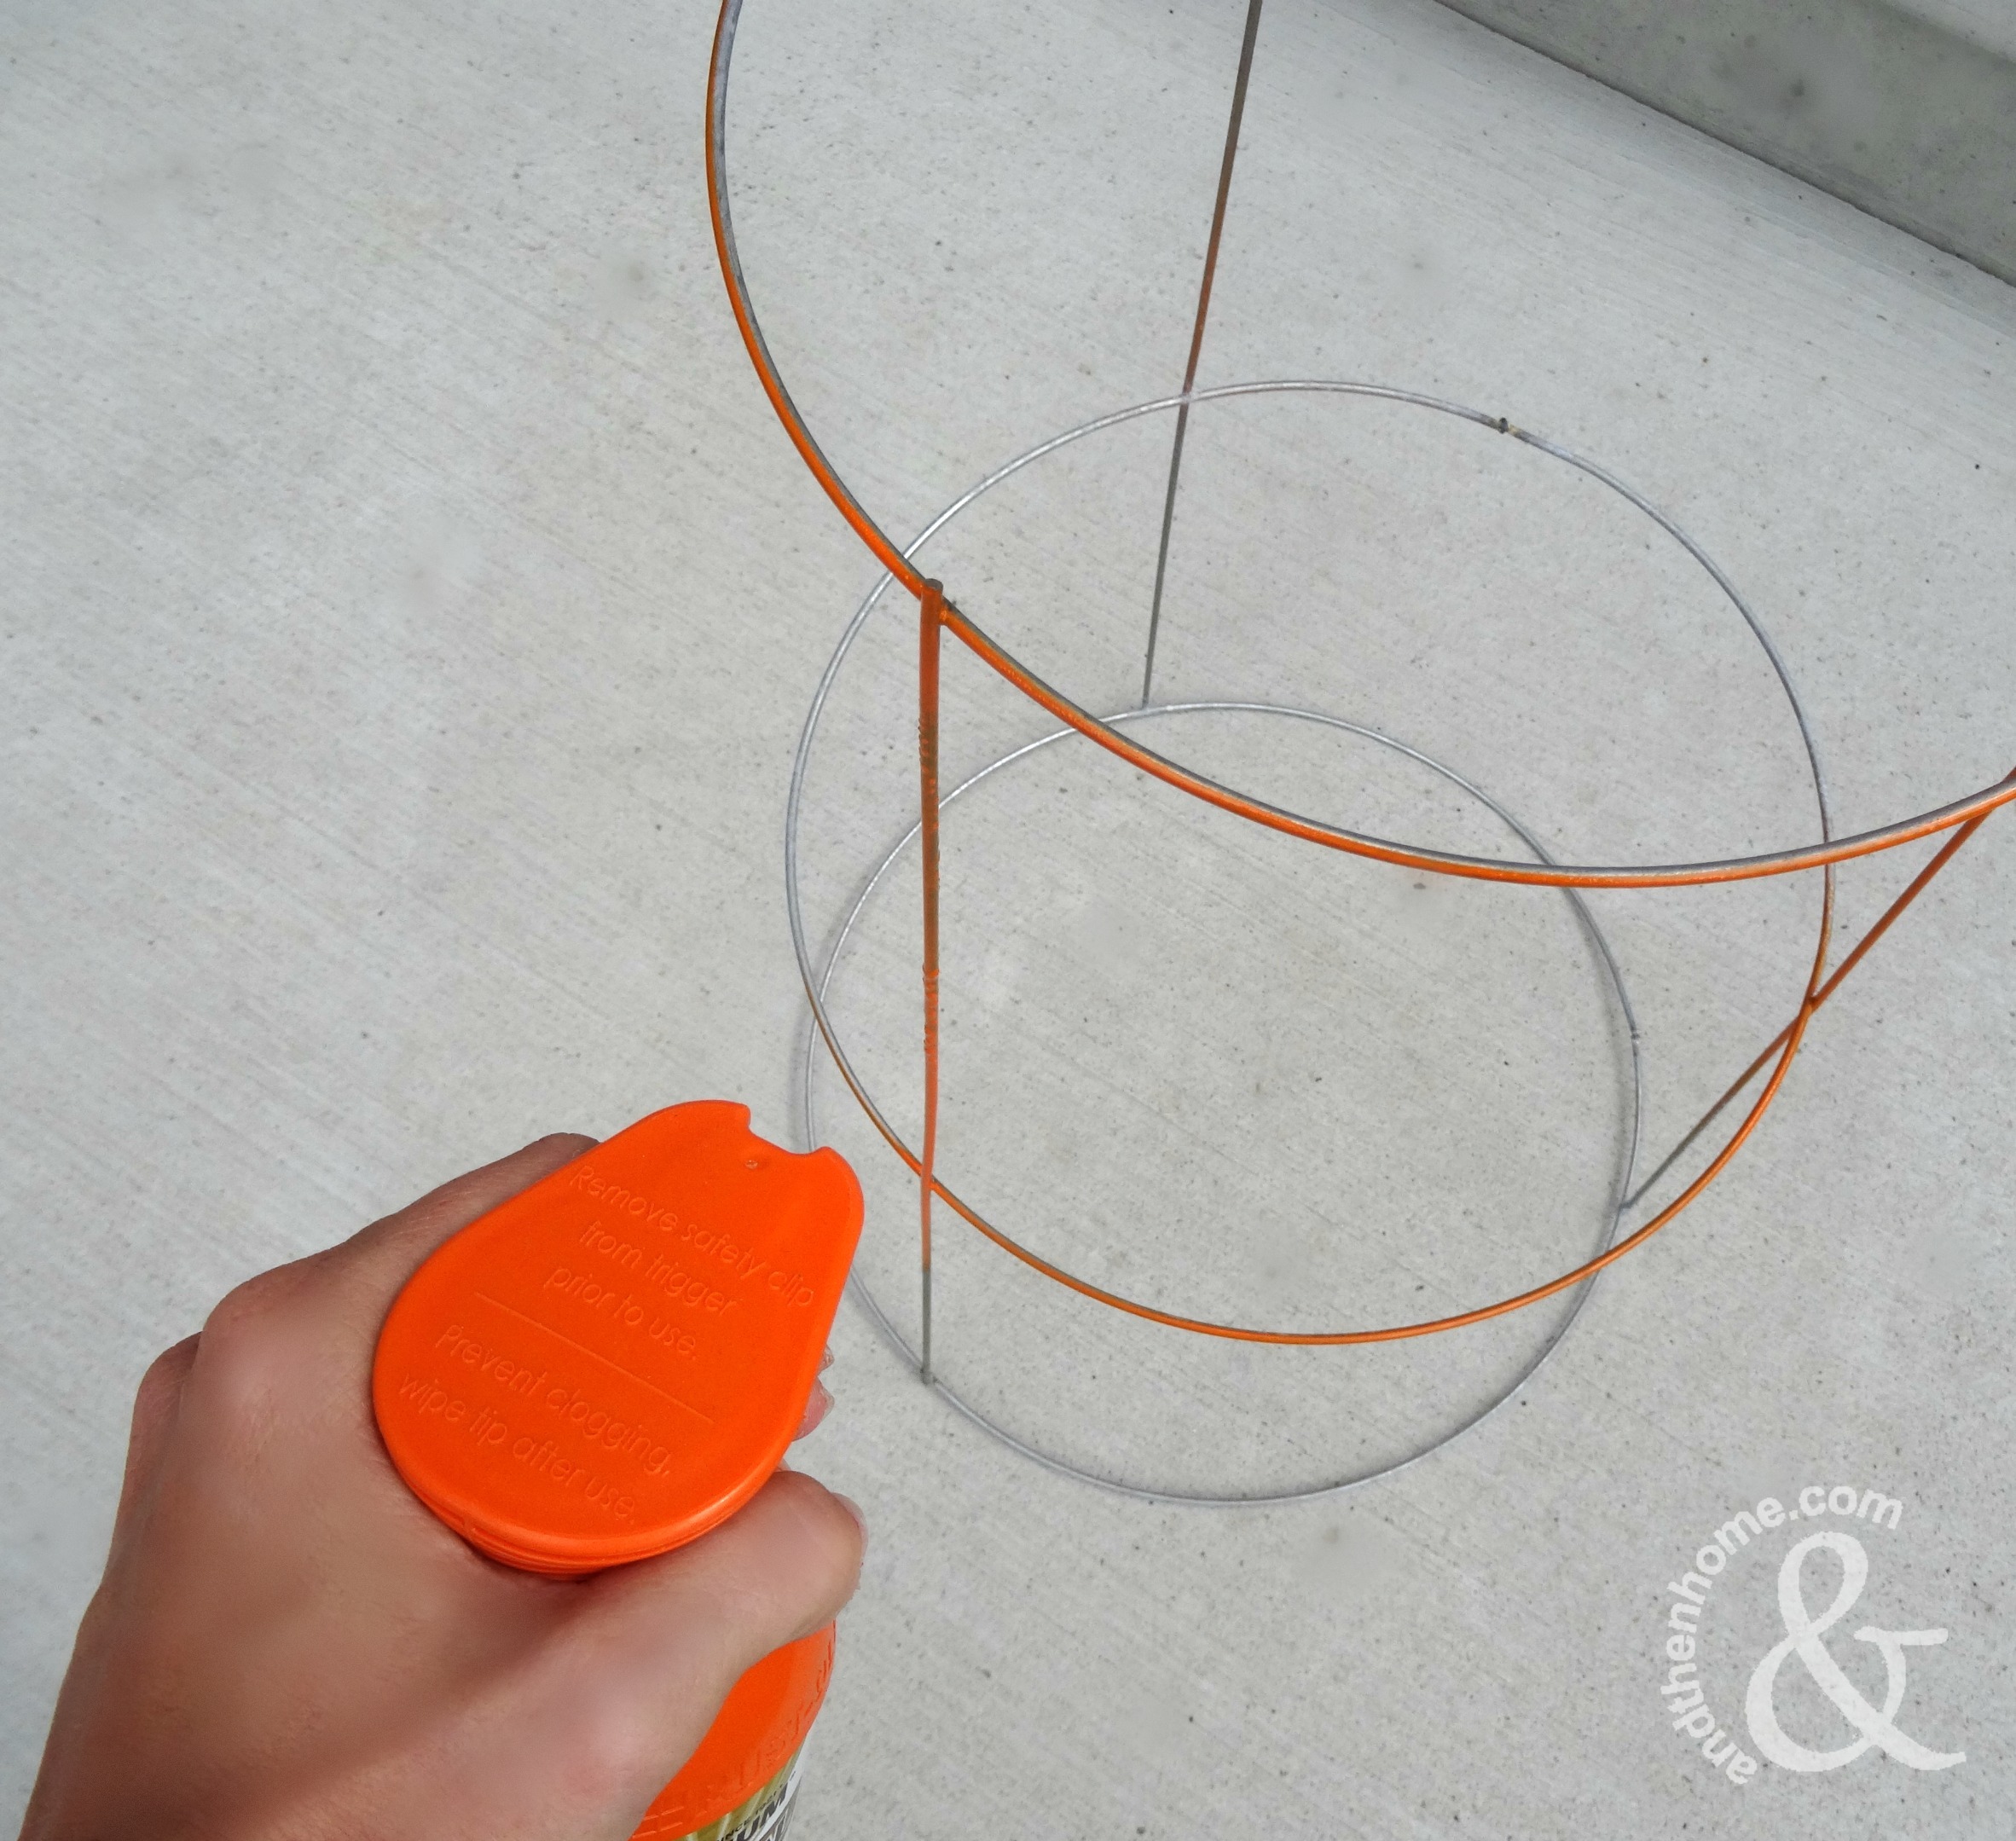
Spray paint the tomato cage – I used orange since our patio cushions are in reds and oranges.
Step Two:

Paint or stain your tabletop. In my case I added a yellow stripe to the top and painted the sides yellow.
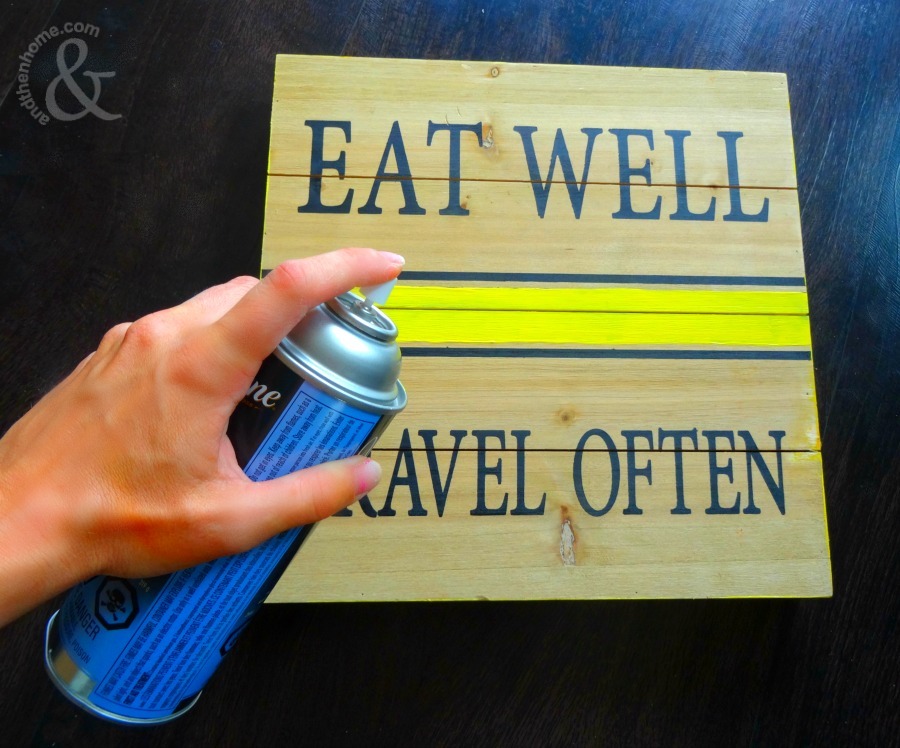
After the paint is dry, spray the varnish over the entire tabletop. Be sure to get a good coverage over the entire surface since the table will be outside and exposed to the elements.
Step Three:
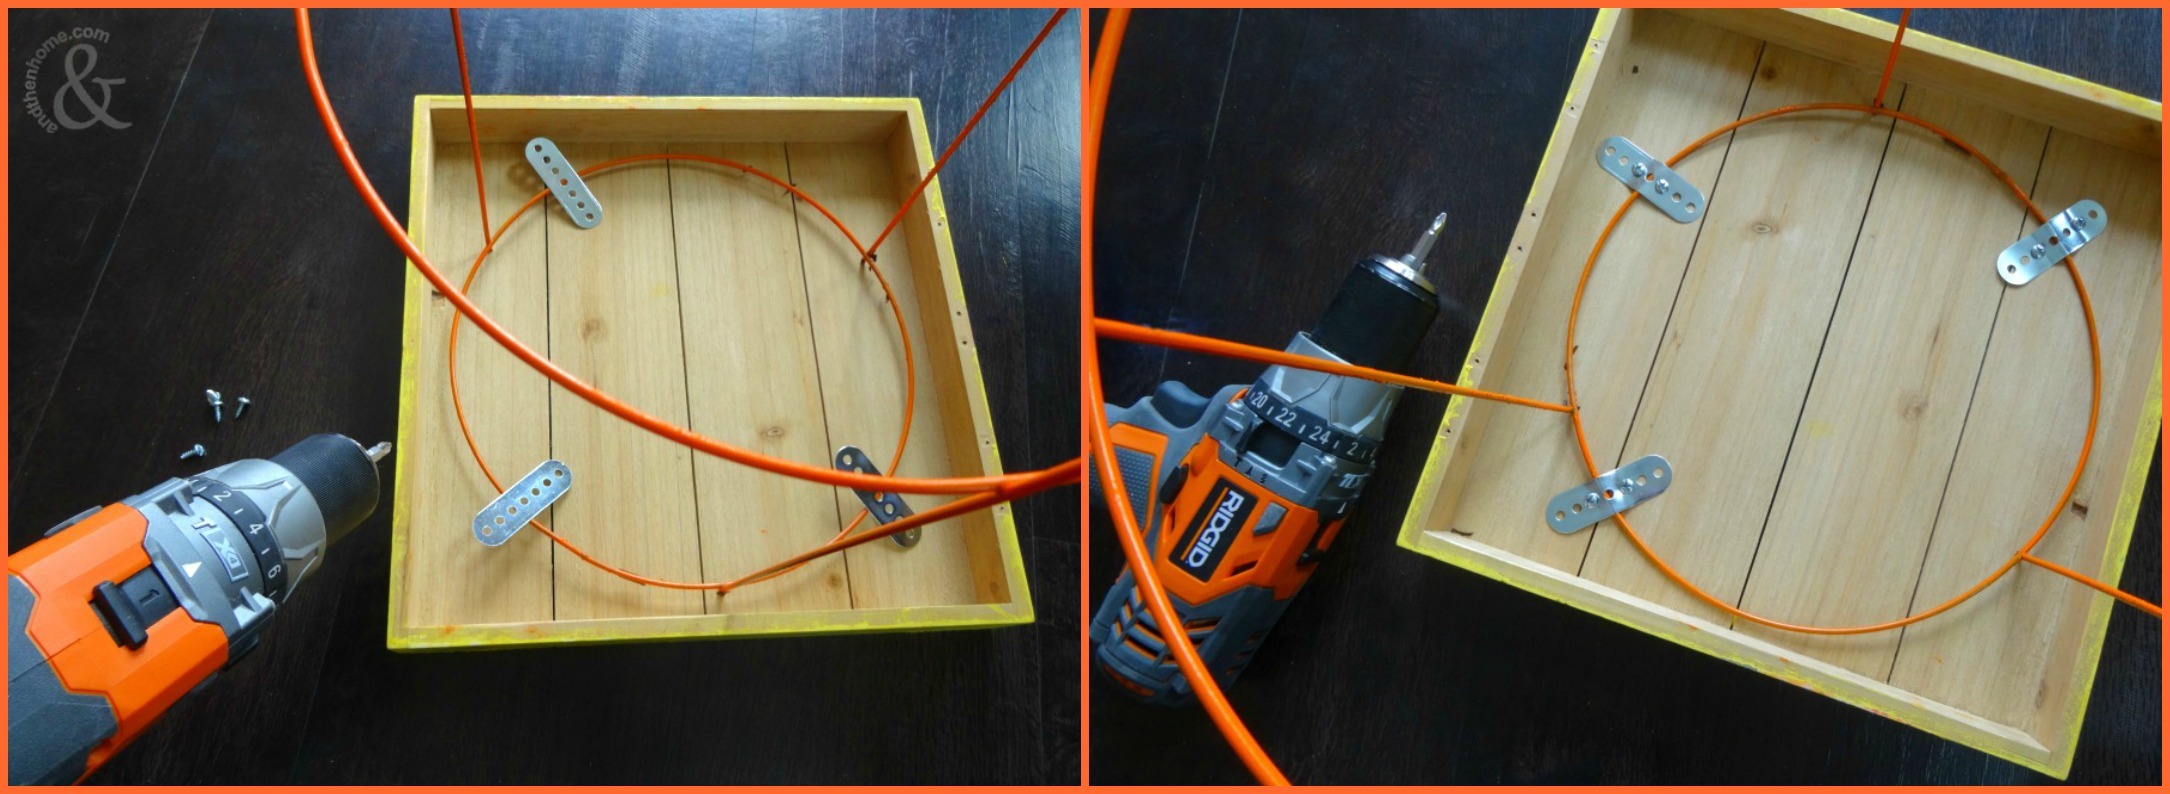
Use the brackets and screw gun to attach the tabletop to the tomato cage legs.
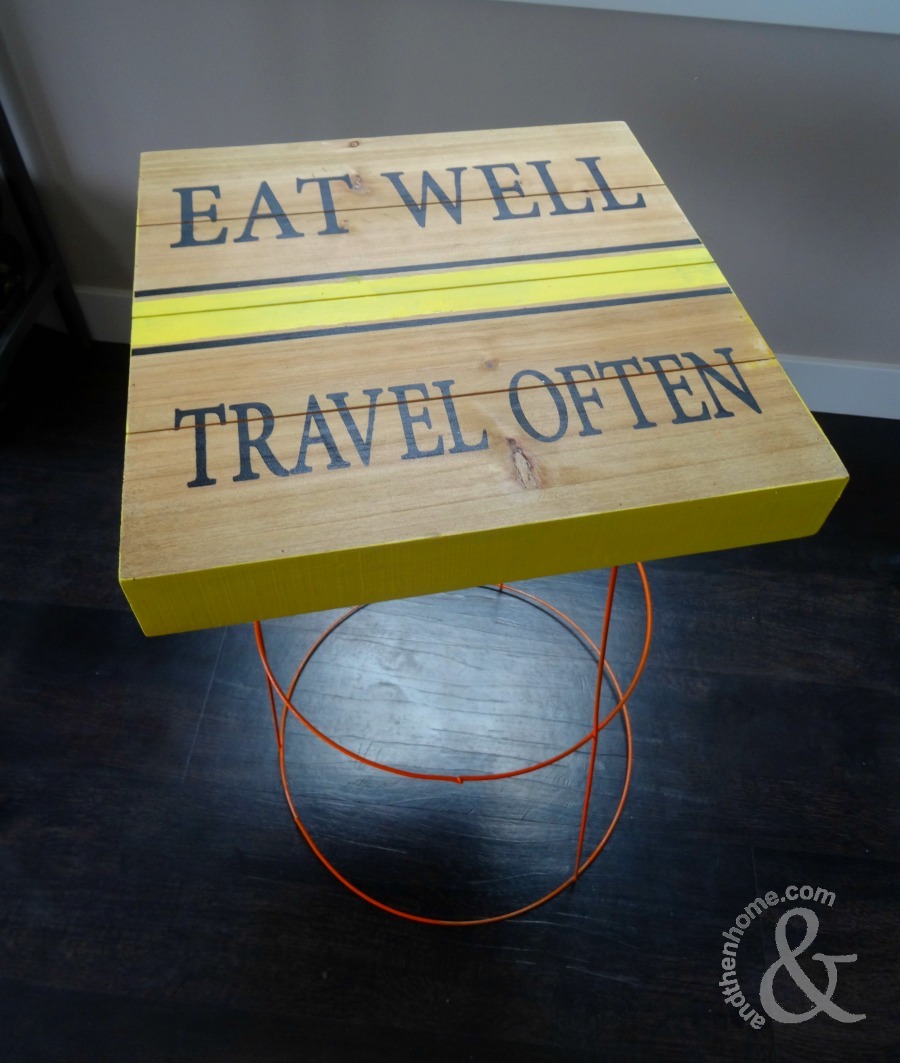
I am in love with this easy little table. The warm colour palette matches our patio set perfectly. I think I might make another for our basement patio too! For more summer patio accessories check out this DIY – Summer Vintage Wood Serving Tray.