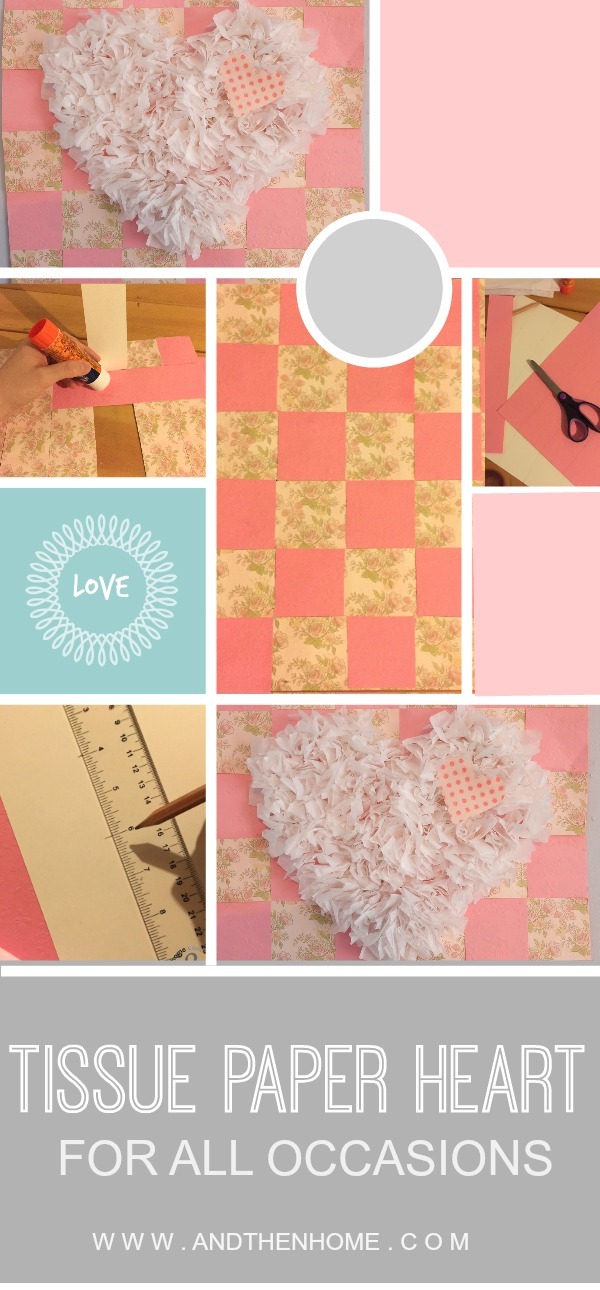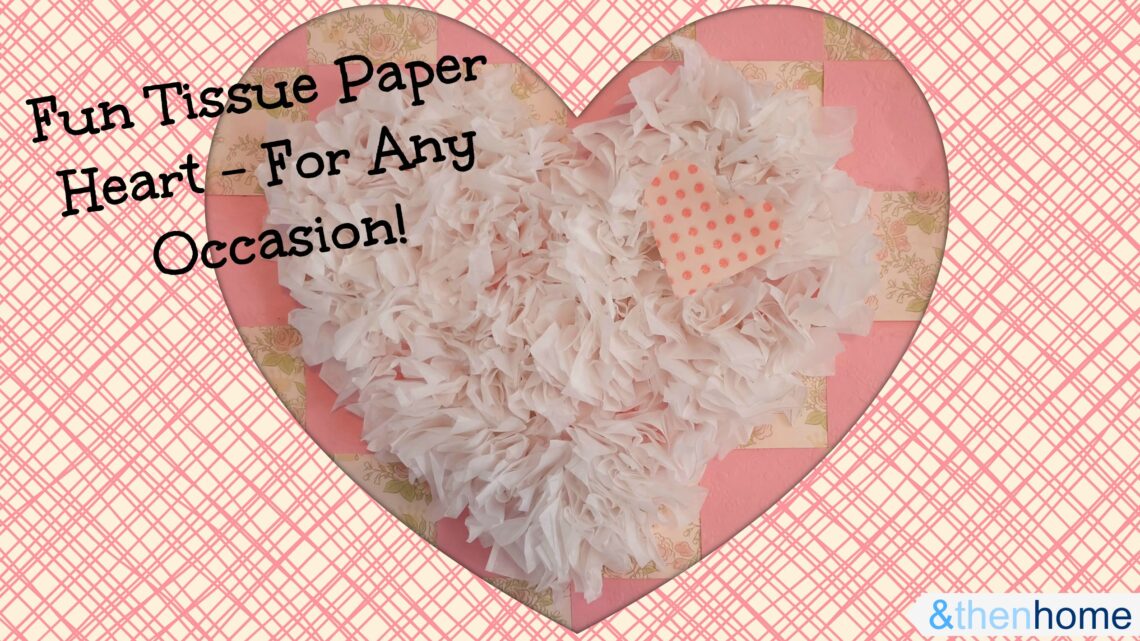
Tissue Paper Heart for Any Occasion
This is a fun craft that looks nice on the wall or in a frame. The materials are easily found at the local dollar store or even in your existing crafting stock. The main thing you need is tissue paper and some 12×12 card stock, construction paper would work too if that is all you have. This easy Tissue Paper Heart can be displayed all year or only on certain holidays. Perhaps the most fitting are Mother’s Day, Easter and Valentine’s Day.
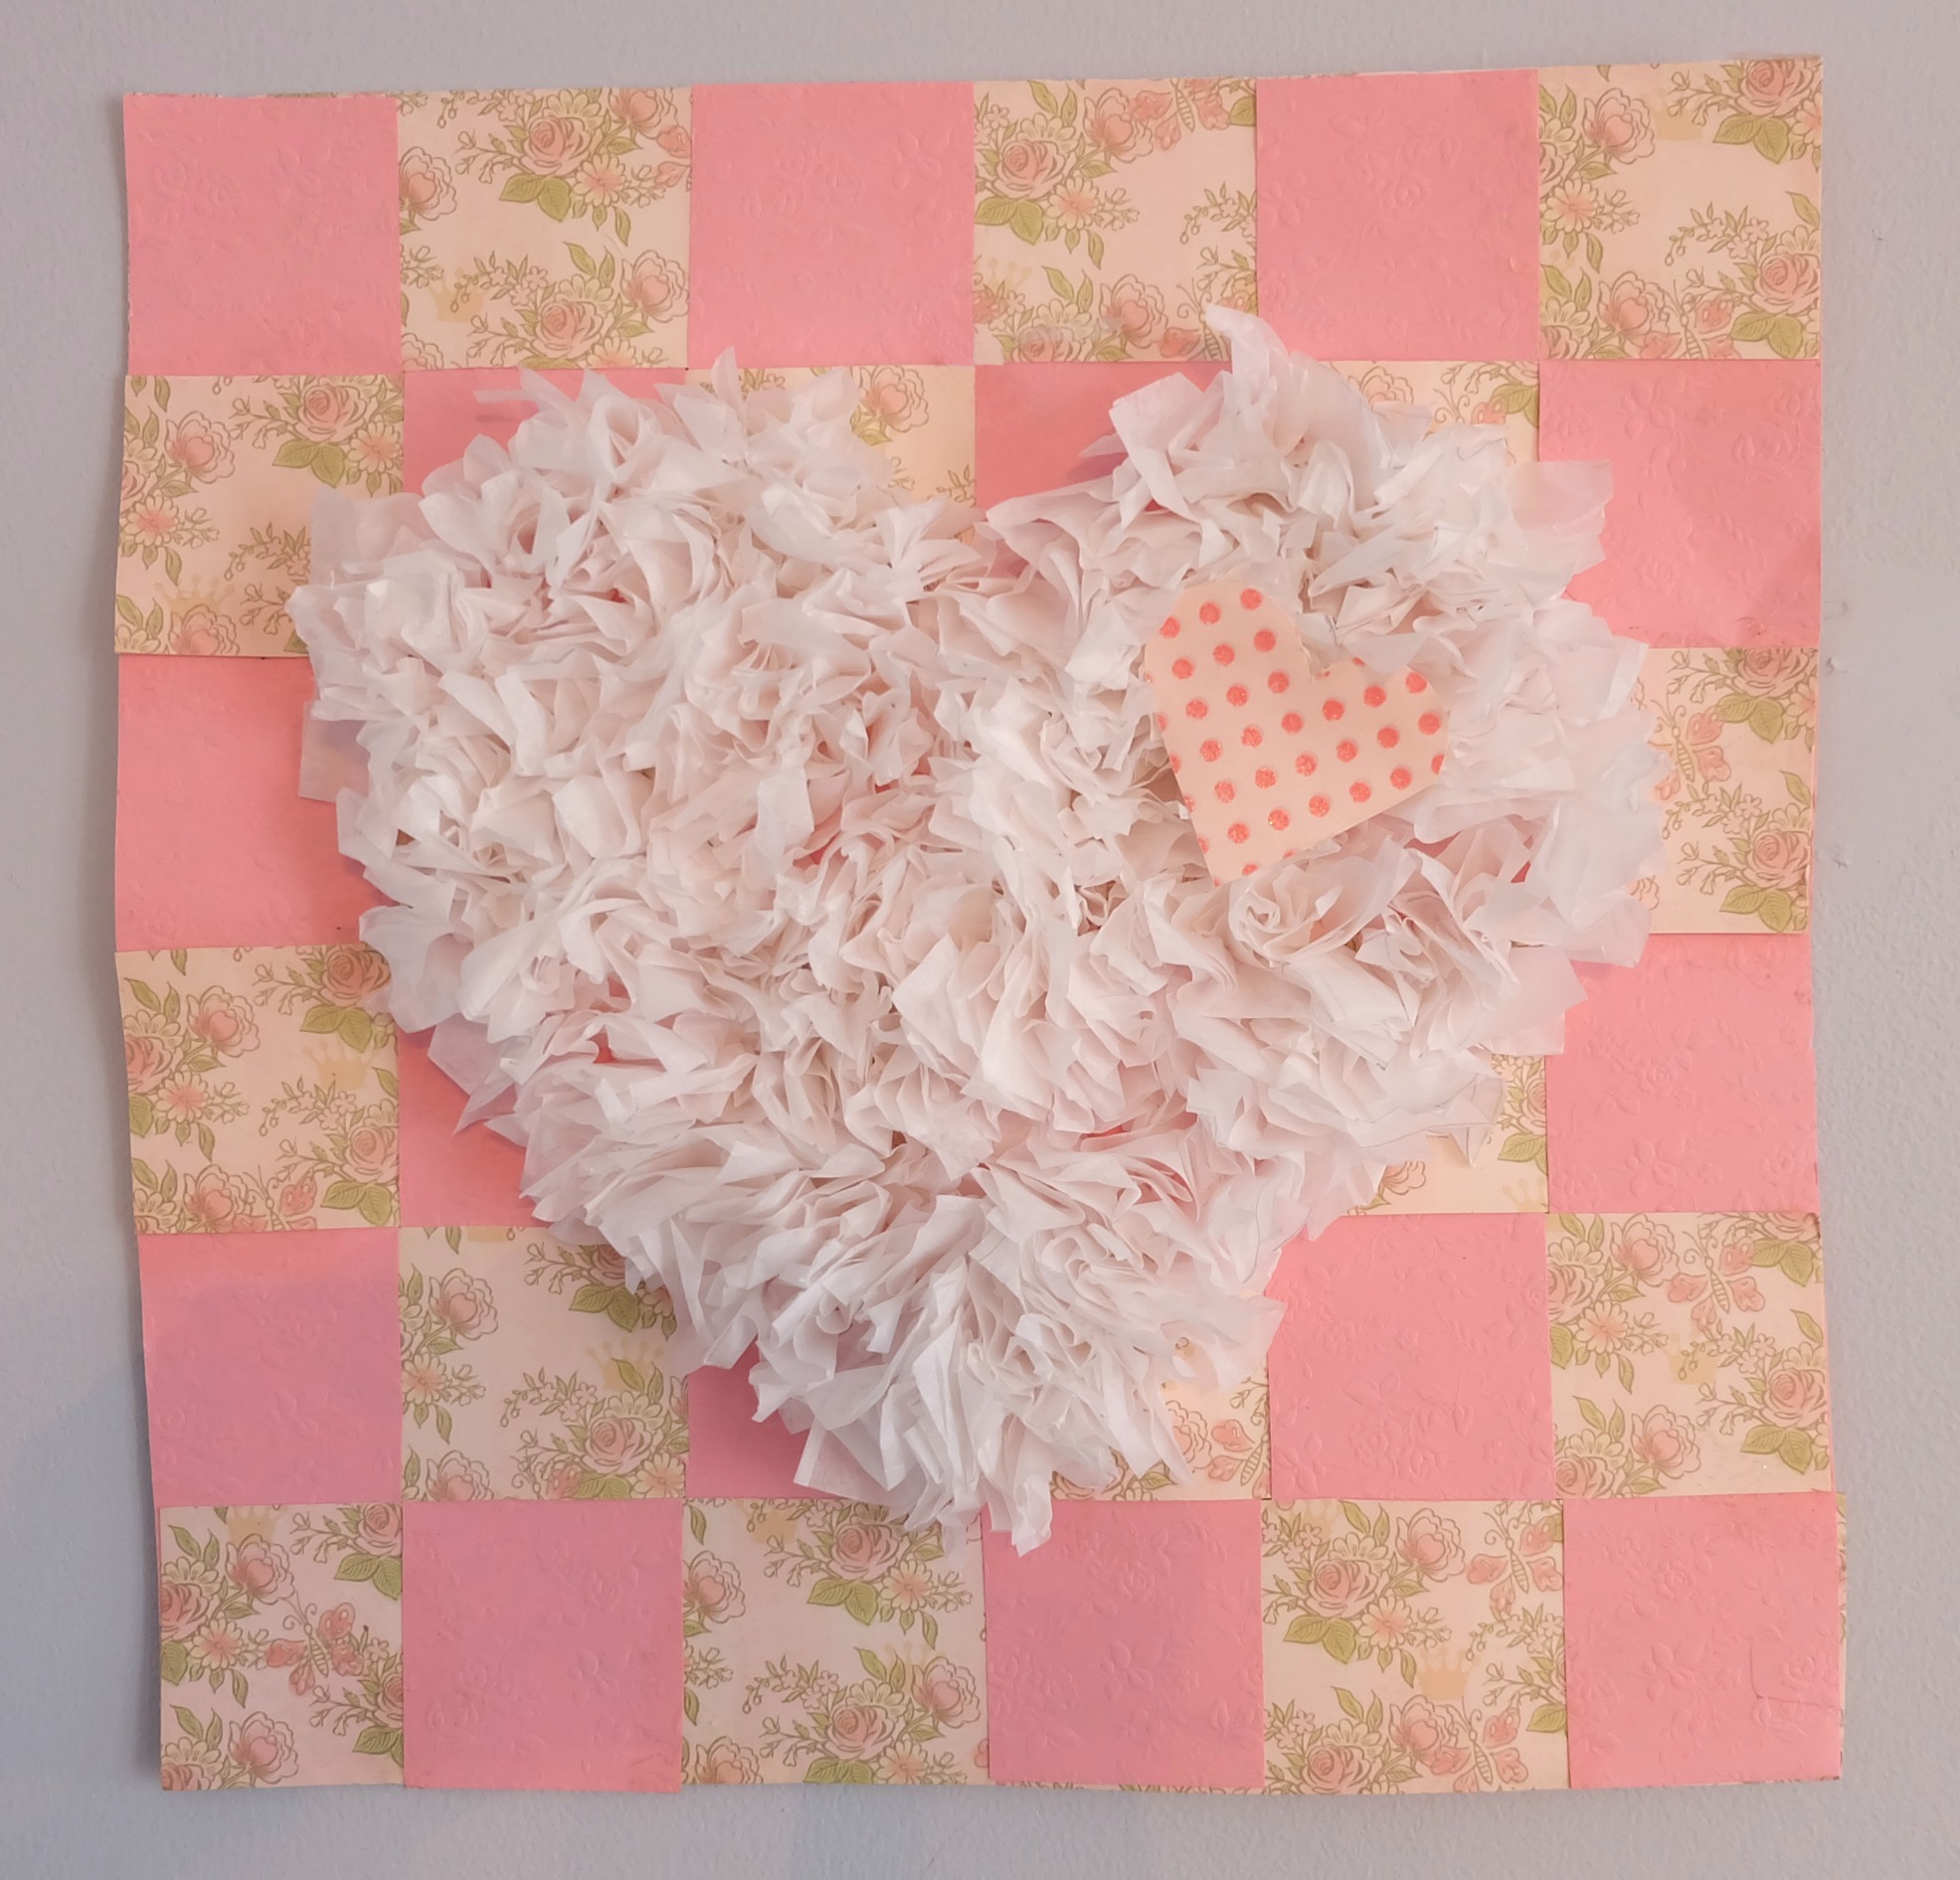
The steps are fairly simple, once your checkerboard background is done, all you need to do is stick the tissue paper down. It can be a little time consuming but the end result is nice, a 3D piece of art for your wall or mantel! Sticking the tissue paper down can also be done by your children, if you have them, a fun craft that they’re sure to enjoy!
The checkerboard background is perhaps the most challenging part of this craft. It does take some time to measure, mark, cut and piece back together correctly, but it quickly becomes worth it once you see the pattern coming together. Let’s take a look at the easy to follow instructions below…
What you’ll need:
- tissue paper
- 2 pieces of 12×12 cardstock
- ruler
- pencil
- glue stick
Step 1.
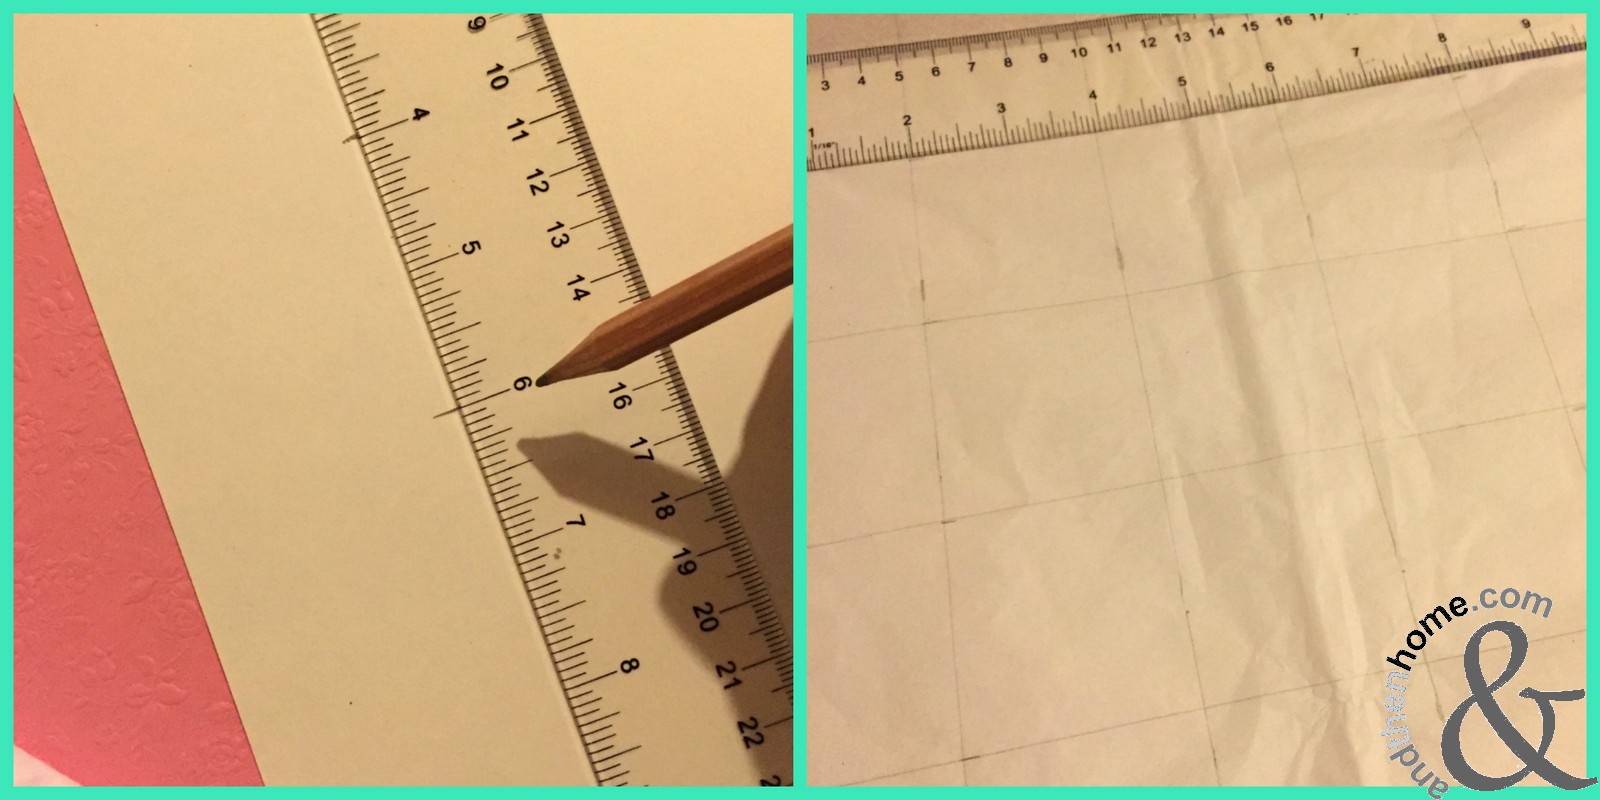
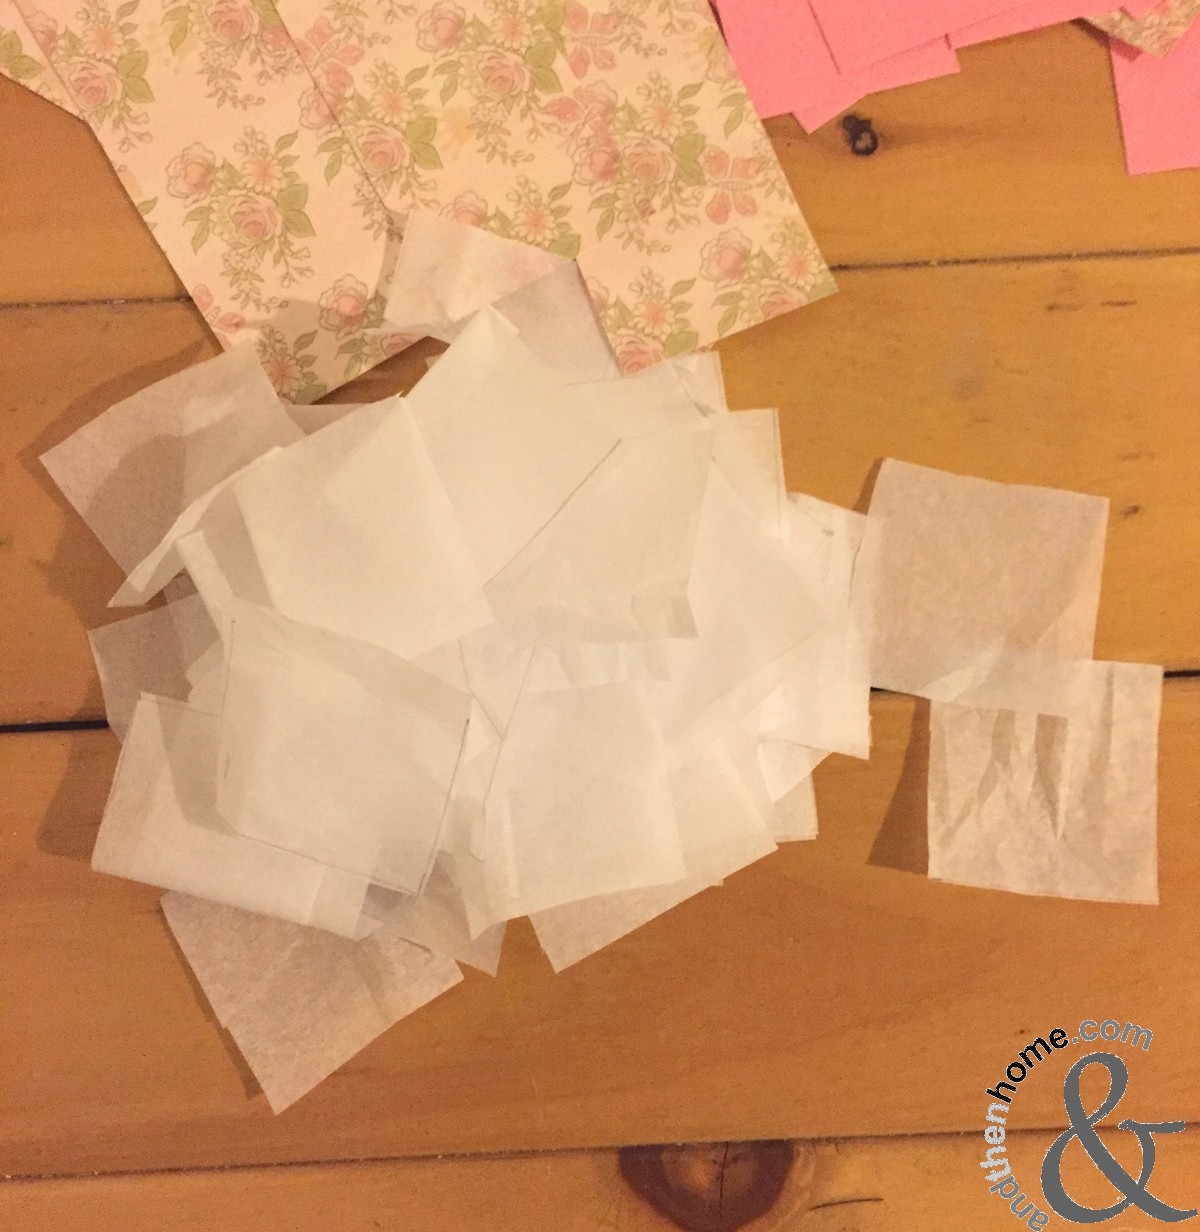
First thing is to take your tissue paper and create 2×2 inch squares. Do this by making 2 inch marks horizontally and vertically across all pieces (about 2 full size sheets are needed). Connect all of the marks with your ruler, creating the squares. Then cute them out to create the individual squares.
Step 2.
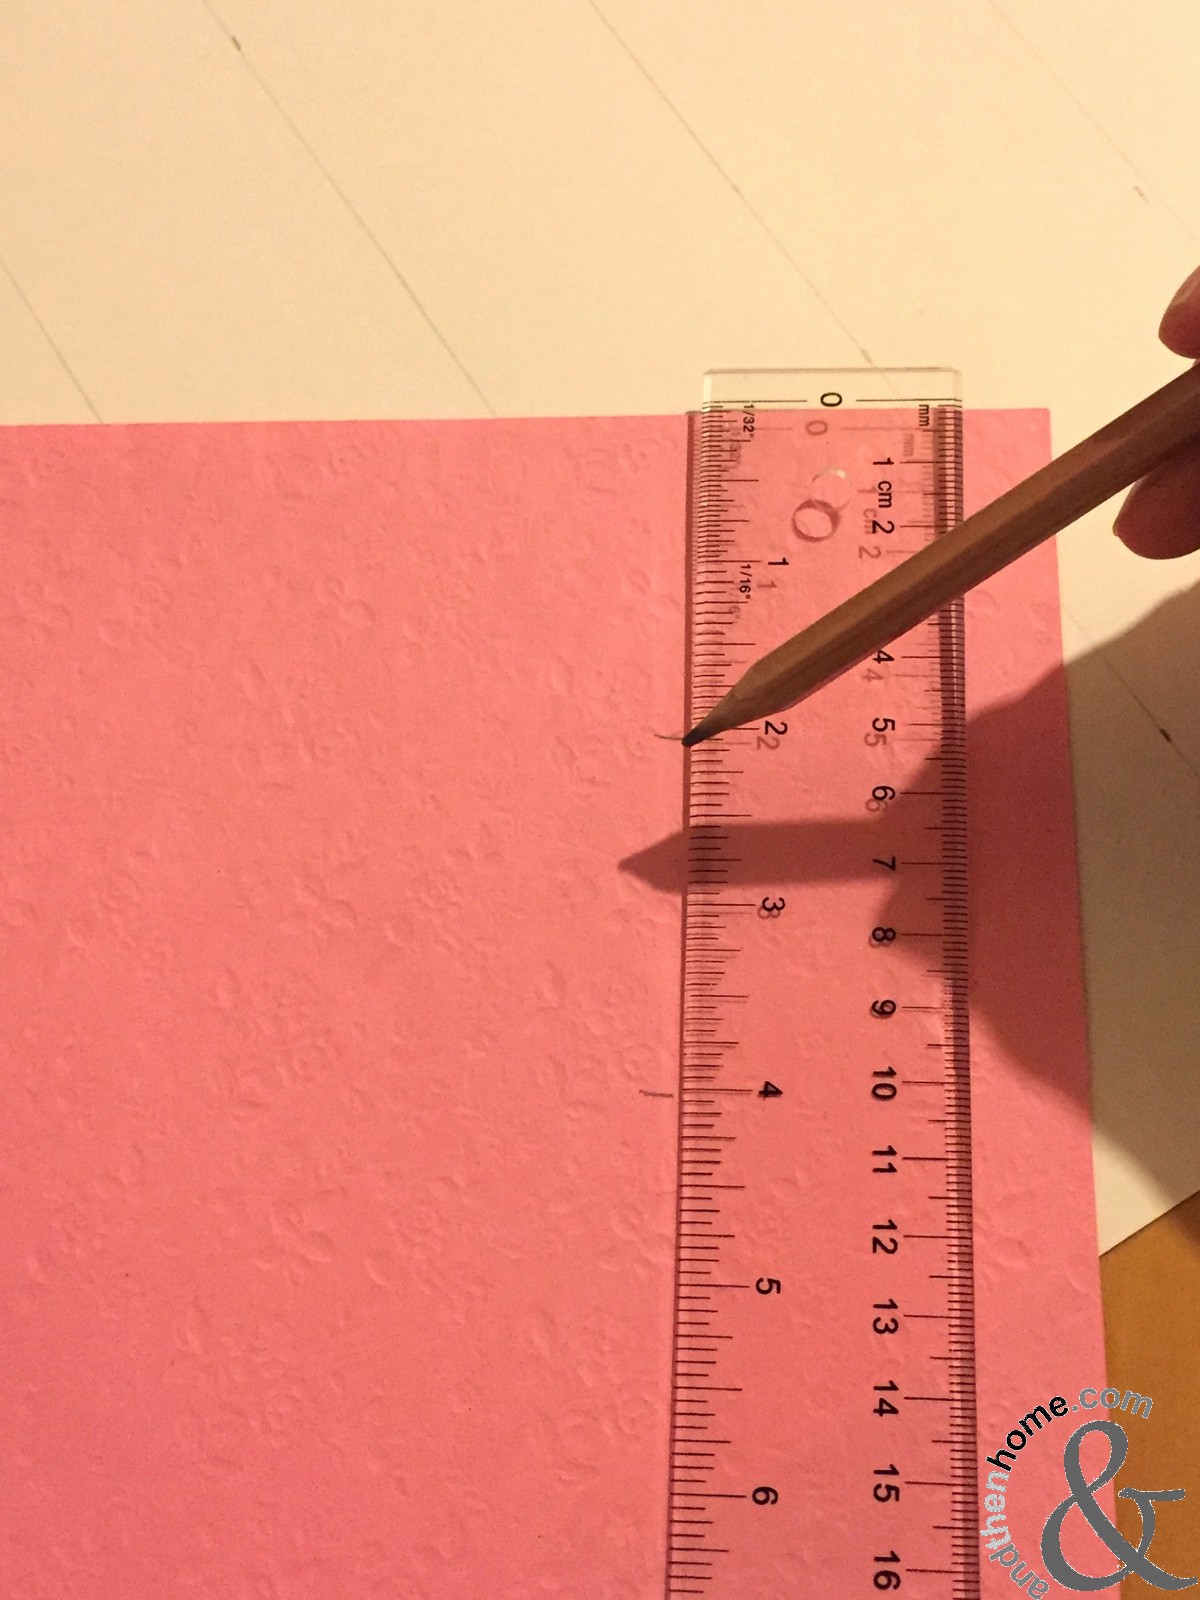
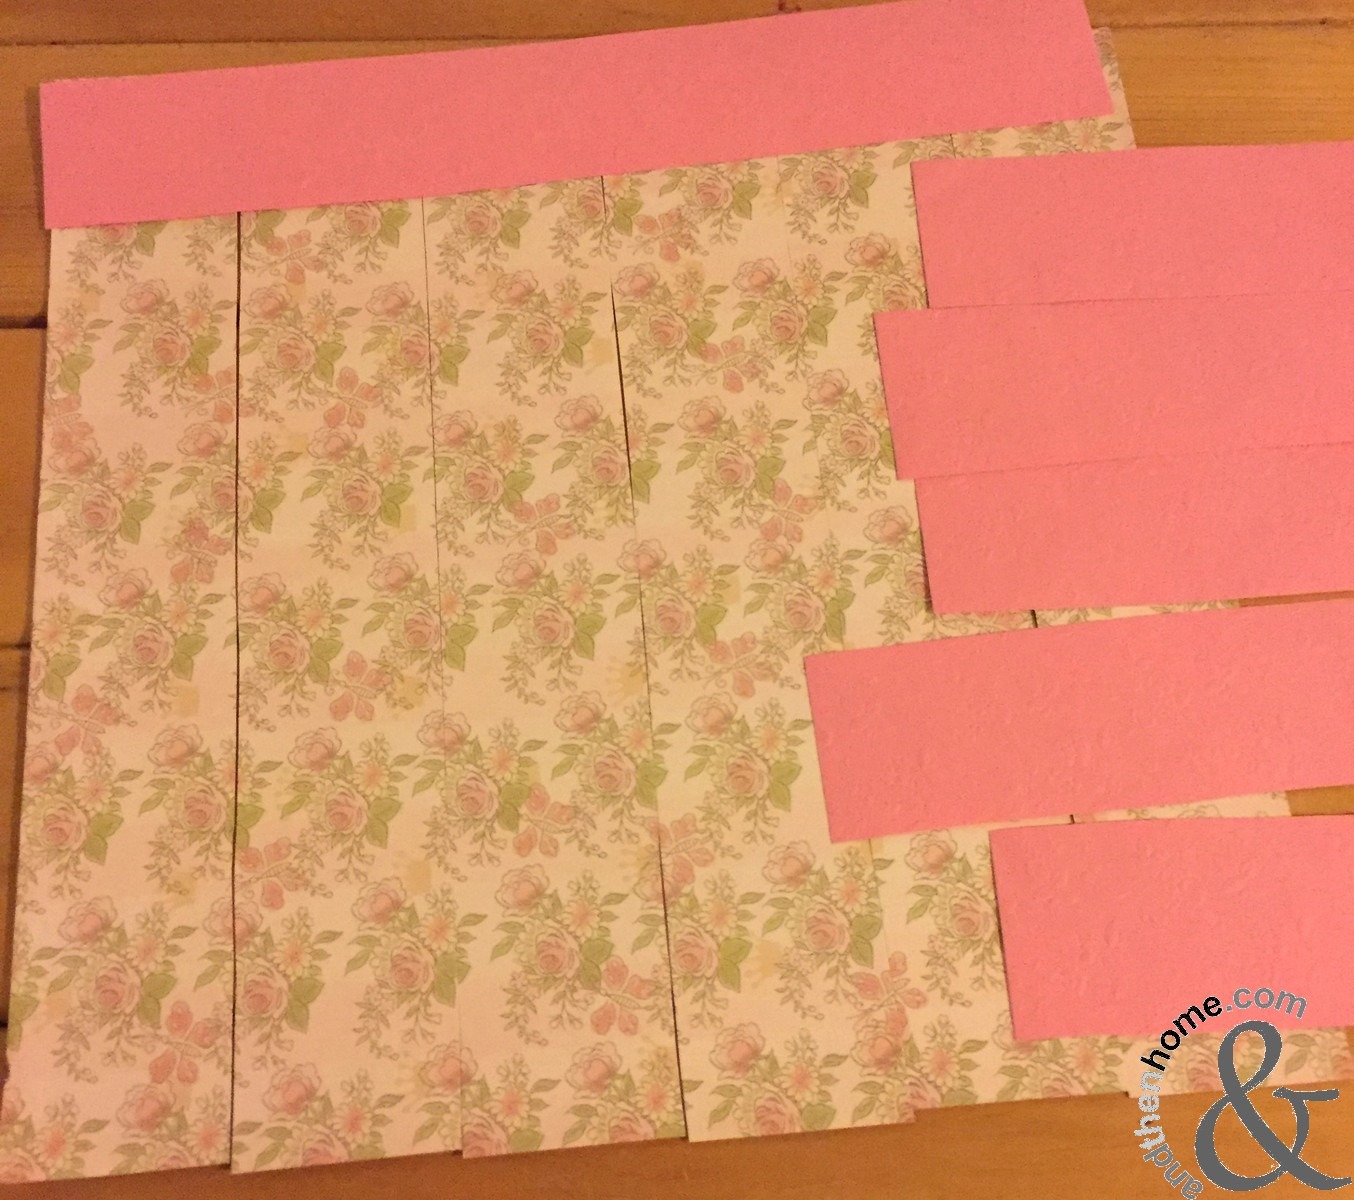
Next you will need to create evenly cut strips out of your cardstock. To do this, measure and mark strips that are 2 inches wide. Once marked, cut along the lines to create strips. There should be 6 strips of each colour.
Step 3.
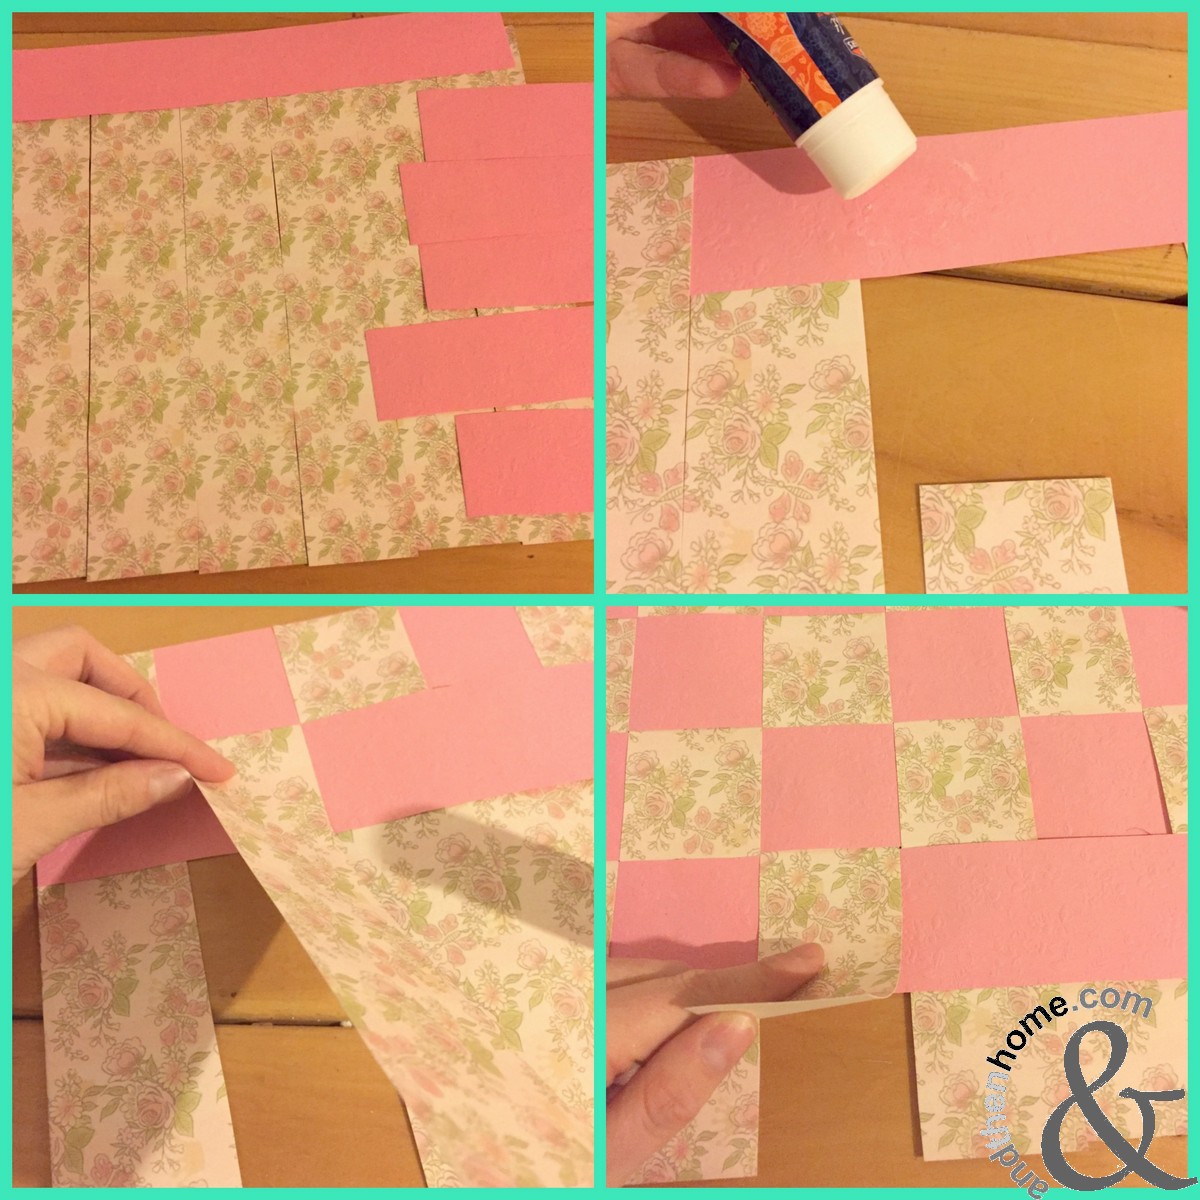
The checkerboard. To create this nice pattern you will need to weave the card stock back and forth between each strip, placing glue to the back of each ‘square’. See the picture below. Once finished set it aside and allow it to dry.

Step 4.
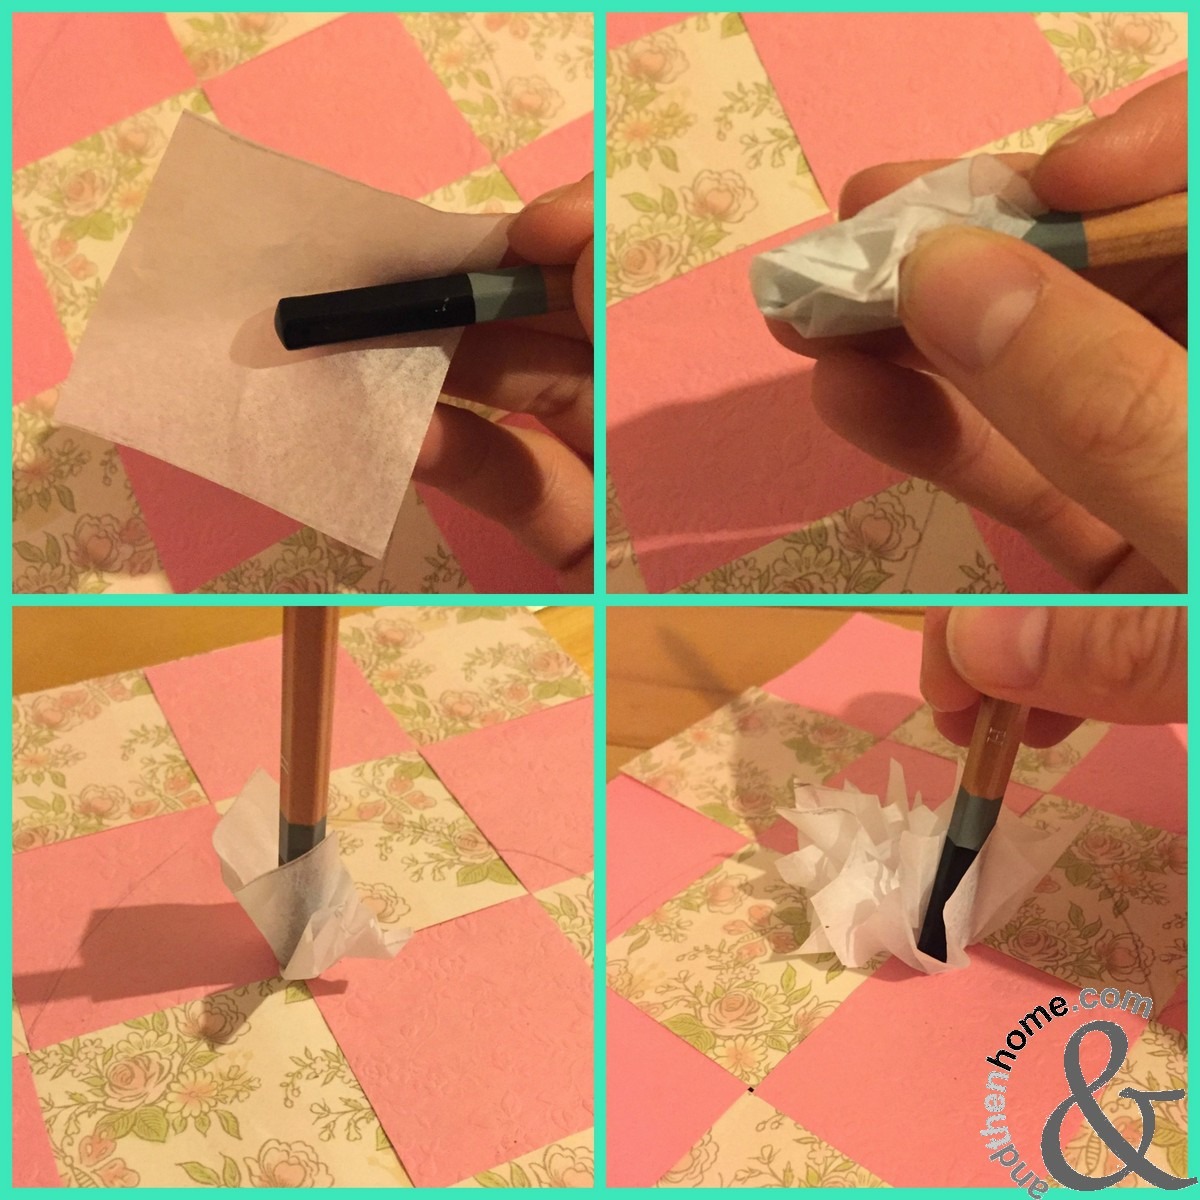
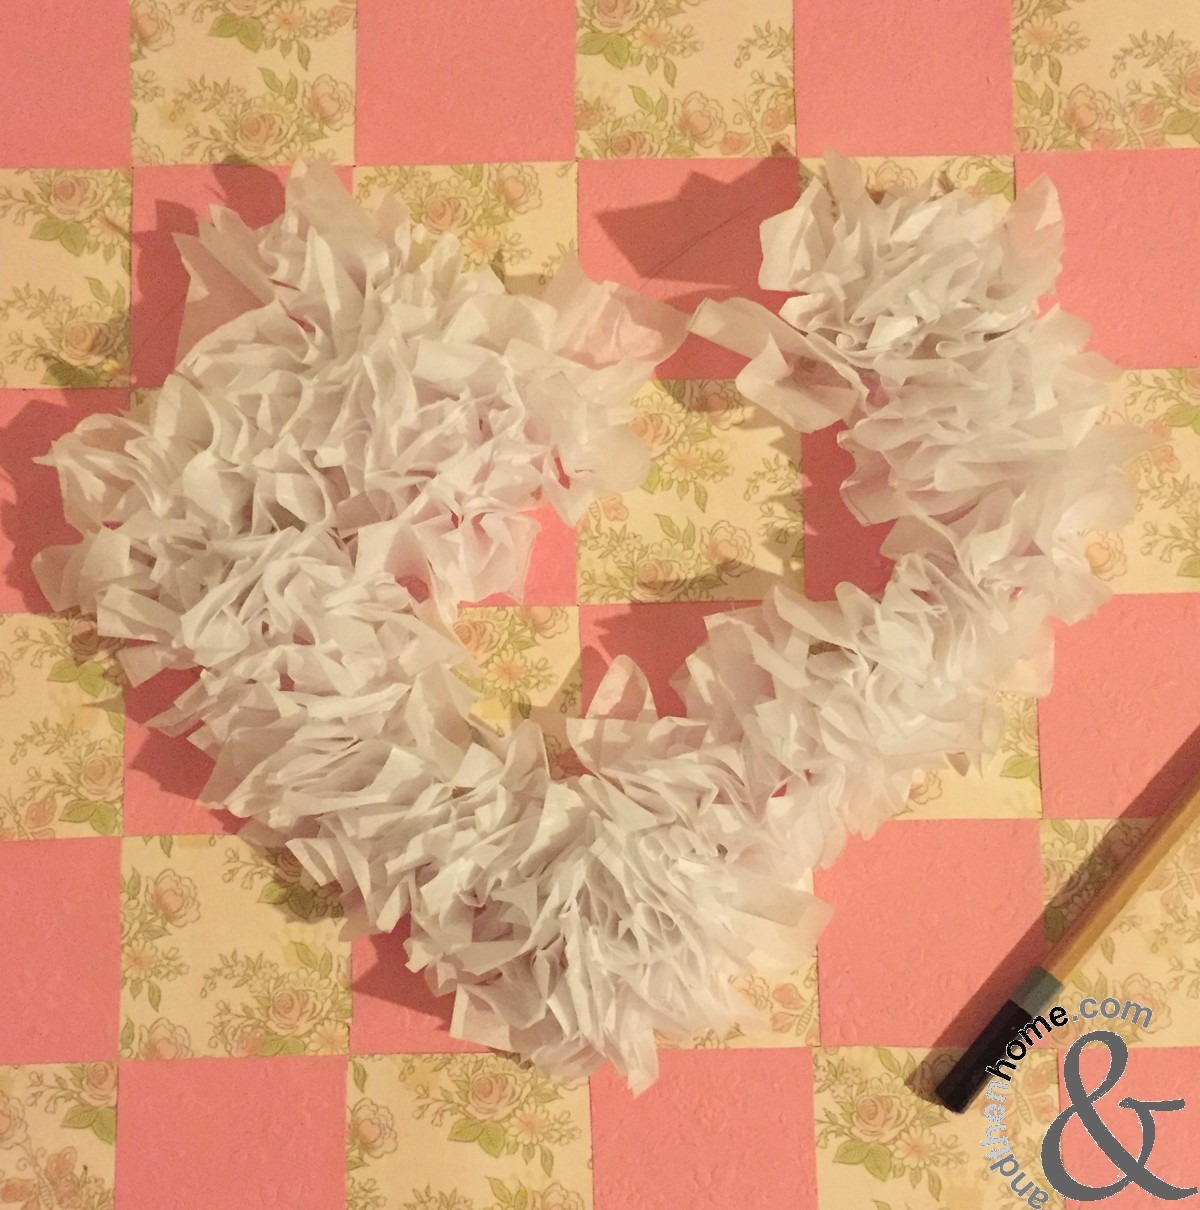
Once your checkerboard background is completely dry, draw a heart in the middle to use as a guide for your tissue paper design. Adding the tissue paper is the fun part! Take a square of tissue paper and gently wrap it around the flat end of your pencil. Use the glue stick to add a small amount of glue to the end of the pencil, on top of the tissue paper, then place your pencil firmly down on your design. Fill in the heart completely, keep the tissue paper close together for a fuller look.
Tissue Paper Heart for Any Occasion
Ta-Da!! A fun craft to make for Mother’s Day, Easter, Valentine’s Day or even just for fun! Try mixing up the designs and colours for different occasions. Need some other fun and easy crafts to do? Check out andthenhome’s craft page, there’s something there for everyone.